Thursday, December 19, 2013

cinnamon ornaments

We've needed lots to keep us busy the past few weeks because it's been cold and snowy.  While M would like nothing more than to be out in the snow all day everyday, we can't do that with baby G hanging out with us now.  So due to G's laid-back nature we've gotten to try out lots of Christmas projects from gingerbread houses to homemade gifts to these fun ideas...

I think these cinnamon ornaments are one of my favorite holiday activities because they're easy to make and always come out cute. They look baked but they're not. In fact, I made them in school one year because it's that easy. 

1/2 cup cinnamon
1/2 cup applesauce
Mix them to make a dough. Roll it out to about 1/4 inch thickness. I rolled it between a piece of parchment paper and a piece of Saran Wrap. Then use cookie cutters to cut shapes. 

Use a straw to poke holes for hanging then let the shapes dry for at least 24 hours. I kept them uncovered on parchment paper and flipped them halfway through. 


Once they're dry they can be decorated and strung to hang. We broke out the glitter glue and puffy paint for this...

-------------------------

While we have lots of time for crafts, I have limited blog-writing time, so I'm including a few other Christmas decorations we've made at the tail end of this blog. 

First, the self-explanatory Christmas tree feet:

And a hand tree. Trace their hands, fold the paper and cut 6 or so out at a time. M loved decorating this with stickers. If I had been more on the ball I would have gotten cute ornament stickers.

Merry Christmas from me, M and G!


Friday, December 13, 2013

bird snacks

We have bird feeders in various places in our yard.  We get a lot of birds because we have woods behind our house.  M always checks out the birds in the morning at the bird feeder outside our living room window.  We have some kind of Japanese(?) tree right outside and the birds seem to love it there. M loves filling the bird feeders with his Papa.  He also enjoys yelling at the squirrels.  

I This morning we were talking about the snow storm that's coming this weekend and how the birds would have trouble finding food under the snow.  I found this activity during a middle-of-the-night playtime feeding with G and I loved it.  A lot of times when I find an idea on a blog I'll then Google it because chances are it's on twenty other blogs and might have different variations.  Most of the first versions of this that I found called for using unflavored gelatin.  Call me weird but giving birds jello seemed odd.  We used honey and bird food.  Seems more natural to me.

We started with a bowl full of birdseed that M enjoyed playing with for a few minutes before we started (sensory).  I didn't measure anything so I can't really tell you how much we used.  I'd guess we had about two cups of birdseed.  I eyeballed adding in the honey.  I was really trying to get a sticky consistency like play-doh but I think we ended up with a bit too much honey.  Then we spread it out and used a cookie cutter....

Our mixture was a little too soggy so what ended up working best for us was filling the cookie cutter instead of actually cutting a shape.  One we did that it held its shape fine.  We put them on wax paper and use a wooden skewer to make holes for string (which are difficult to see here).  


They're currently freezing in the freezer.  Either this afternoon or tomorrow morning we will string them and hang them from our Japanese tree.  Photos to come...

Friday, December 6, 2013

christmas ornaments 2014

When our kids are grown up it's my hope that we'll have some kind of child-made ornament on our tree from each year they were little.  Until they're in school and they (hopefully) have teachers who will help me with this, I'm on my own.  Miles has this ornament from his first year.  It doubled as the favor from his Baptism.  We made this one (one of my favorites) last year.  I found lots of fun ideas on Pinterest this year but we ended up doing our own thing...

I used Model Magic this year, basically because I have a newborn and I'm not about to mix salt dough. I have to include the disclaimer that I have never used Model Magic for anything that I wanted to last for a long period of time.  I have no idea how this ornament will hold up long term but I did coat it so hopefully it works out.  This ornament is Model Magic rolled into a ball, flattened, and cut into an oval. M then pushed his hand into it to make a hand indentation.  Then I did the same with G's hand over M's.  As I've mentioned here and here and probably various other places, baby handprints are the bane of my crafting existence.  Her hands were not painted.  They made the indentations then I painted over them on the ornament.  No handprints involved in the making of this ornament:
As you can see we also attempted a footprint, that I haven't decided what to do with yet, and M made a red moon in the process.  I also ended up writing "2013" at the bottom of M's hand in gold.  

I also did a ball ornament for G similar to M's from his first year that is linked above.  Quick and easy footprint on a ball with her name and the year written on the other side.  Tip- roll the baby's foot not the ball.  I love that we have two of these now:

Pinterest and Facebook have made late night feedings more fun and I did end up pinning a number of other ornament ideas you might want to check out.  You can find most of them on this board. 


Wednesday, November 27, 2013

fun with turkeys

Well, I have successfully posted our turkey blog before Thanksgiving.  I wasn't sure we were going to make it!  We've done two crafts in the past week or so that have helped us decorate and get ready for Thanksgiving tomorrow.  M's favorite was the apple turkey....

M doesn't always have the patience for activities that require a lot of fine motor work but this kept his attention (I think because it used marshmallows).  For this project you need an apple, toothpicks, something for a turkey face, and small food pieces that can be put on the toothpicks.  We used marshmallows and Cheerios.  If you're health-conscious you could do blueberries or small grapes.  Anything works as long as it goes on a toothpick.  

Here is M filling his toothpicks.  It took a bit longer because he enjoyed putting them on then biting them off....

Here is our finished turkey....

We also did a toilet paper roll turkey that included my favorite- handprints. We made our handprints on thicker cardstock.  M painted them with yellow, orange, and red paint then I cut them out and glued them to the paper roll, which makes the turkey's body.  Unfortunately I can't find the pictures I took while we did this so we only have an "after" picture.  This poor turkey has been a little man-handled and also survived one dog attack so he's a little worn but he's made it to Thanksgiving!

Hopefully we have a few more blog posts coming soon.  We've done a few keep-busy projects since little G has arrived but haven't had time to post about them.  Hoping to get caught up soon!


Wednesday, November 13, 2013

sibling handprints

A few weeks ago, while we were waiting for Baby G to arrive, we started this project. I mentioned it in this post.  Two weeks ago G joined us and since then we've finished it. 

I've said before that newborn handprints are pretty elusive. Back when M was a newborn I changed this idea from hands to feet because (at least my) newborns aren't especially cooperative when it comes to painting hands.  We had to get a handprint for this one though because a hand and a foot would have looked a little funny. Therefore, you'll notice G's handprints are a little smudgy. We got the best we could. 

Here they are; small canvases from any craft store, I think they were BOGO when I bought them at Michael's.  A handprint from M and a handprint from G.  They now each have one hanging in their bedrooms.  G's first art project....

Monday, October 14, 2013

october art

Last week I realized that last October our kitchen was full of fun fall art and this October all we had hanging up was a half-finished water colored coloring book page of Ernie trick-or-treating.  I suppose I could blame that on our countdown to baby G and the fact that baby prep has come before toddler art but that excuse makes me sad so over the long weekend we did a few projects to make our house a little more seasonal looking.

We did my most favorite Halloween project last year but this year's were cute too.  A few months ago we needed cotton balls for one of our many dog ailments of the year.  I don't think M had ever really seen them and he took to playing with them and calling them "bunnies."  I knew he'd like this project because it included cotton balls and ghosts, a new favorite since a neighbor hung a big ghost in the tree outside their house.  We used about 10 cotton balls (spread apart) and black construction paper cut into a ghost shape.  


I spread glue over the ghost first but if M were older I would have had him handle the glue.  He had to take the cotton and stick it on.  Being the efficient two-year old he is, he took all the cotton at once and dumped it on the ghost so we then had to work on spreading out the pieces.  


We also did a paper plate pumpkin that M enjoyed painting.  He loved using the big foam brush.  We've been playing with pumpkin faces lately so once he finished painting and the paint was still wet I let him stick on the face pieces by himself and then I glued them as he had left them.  He did a pretty good job and I love the crooked-ness of it.  


We also started a special project over the weekend that I've been looking forward to.  We can't finish without baby G so this is a "to be continued" part of the post for a few weeks from now.  About a month ago I bought two small canvases especially for this project.  While we had the paint and smocks out for our pumpkin I figured we should get M's piece done because I clearly remember how hard it is to get a newborn handprint on anything.  

On each canvas will be an M handprint and a G handprint.  One will hang in his room and one will hang in her room.  To be continued....


Friday, October 4, 2013

glow tub

M and I have been celebrating "fun Fridays" since I went back to work in September. We do something fun together like the zoo or a park. Today's fun Friday was going to be mini golf and a picnic lunch in our yard but it got rained out.  Instead, we celebrated Friday with a special take-out lunch and then a glow tub.

We got our glow sticks in the Target dollar aisle. They had a large pre-Halloween selection. I almost went with the glow bracelets because there were more in a pack but these sticks were pretty bright. We only had two but M was completely entertained by them both during and after his bath.  Four would have probably been ideal. 

I've seen this on various blogs before.  Our tip- use bubbles. It looks much cooler. 


And after- glow truck


Monday, September 30, 2013

magnetic pumpkin

We're starting our Halloween activities a little early (is it still September?) because our Baby G countdown is on and with her due date a week before Halloween, it's hard to know what we'll get in towards the actual day.

This is our first Halloween/pumpkin activity.  We have a few others here from last year that M could completely do again this year at 2.  We started this activity last week when we painted our paper pumpkin orange.  I was going to use orange construction paper but M loves to paint so I thought he'd enjoy that more.  I also used a sheet of black craft foam to cut the jack o'lantern pieces.  Each piece then had a magnetic strip attached to the back.

We taped the pumpkin to the fridge and stuck the pieces on the fridge next to it.  I made a face to start and M caught right on...


M had already done a pretty good job of giving a real pumpkin a face with his Nonni last week so this worked out well.  He liked changing the pieces.  I ended up making about 4 interchangeable sets of  face pieces.  I almost didn't put them all out because I could picture them all over the floor but so far that hasn't been a problem.  Another benefit- shapes.  M knows a few and likes naming them - win win.


Tuesday, September 3, 2013

end of summer

This week is the last week before I go back to work.  It's also the last summer vacation week (ever) that will be just M and I, as the countdown to Baby G is at about 7 1/2 weeks.  We've had a fun summer and I haven't had a chance to blog all the fun things we've done.  I thought I'd use this entry to add some activities that haven't made the blog yet.  Even though I've made my best effort to make lots of beach, park, and outdoor activities happen, the bottom line is that we've had lots of indoor fun this summer thanks to this pregnancy.  Putting it in writing now so I don't forget in the (long-shot) chance of #3 coming along: a June baby pregnancy is much more weather-friendly than an October baby pregnancy.  Bring on the fall!

Cardboard caves-
M loves tunnels.  Driving through one is especially exciting but since we don't have a whole lot of tunnels around here, he likes making them for his cars, trucks, and trains.  This idea came from M's dad, who saw it on PBSkids.org.  We simply cut a few tunnels out and added some decor.  I could have spent $100 on a Thomas set but I didn't.


Five Little Firefighters book-
This one admittedly took much more effort on my part than M's.  However, I love how much this child loves books and I love how excited he still gets to read his book so we made a second handprint book about firefighters, another of M's favorite topics.  Another thing I love about these books is that they're made up of handprints that won't be that little for long :)
The Five Little Firefighters poem and book idea came from this great website.  The poem is as follows:
Five little firefighters sleeping in a row.
Ring goes the bell, down the pole they go.
They jump on the engine and put out the fire.
Now they're back home, safe but tired.
We love rhyming poems/stories because after two or three readings M gets really good at finishing the rhymes.  He loves "reading" himself.  Here's our version:


Baby G's lamp - 
I posted about the various DIY projects we did for G's room.  At the time, I mentioned needing an idea for a lamp.  I really love the Pinterest-inspired lamp I made for M's room and wanted something just as cute.  This is another Pinterest-inspired lamp shade idea from a Disney-sponsored website.  
G's room theme is moons and stars in yellow and light purple with a bit of gray.  I traced stars on contact paper and then stuck them to a white lamp shade.  Then I used cosmetic sponges to sponge the paint around the stars.  The paint was watered down to help it absorb better to the lamp shade.  After it dried, the contact paper was taken off.

In addition to DIY pieces for the nursery, I did a lot of Etsy shopping.  As soon as we found out G was a girl, one of the first items I ordered was a letter G for her bedroom door from the Etsy shop, Posh Dots.  When M was born I ordered an M for his door to match the teddy bear theme of his nursery.  Even though his room has since transformed into a sports-theme, his teddy bear M still hangs on his door and will until he makes me take it down.  Here are the M and G, both custom orders, both done exactly how I had hoped:


Wednesday, August 14, 2013

recycled airplane

M and I raided the recycling bin this morning to find pieces to make an airplane.  I've been meaning to buy some real toy airplanes (like these) to hang from M's ceiling in his room but haven't gotten around to it yet.  This morning we made one of our own completely from recycled stuff.

M had fun looking through the cardboard pieces in the bin, pulling them out, and putting them back in. We ended up taking out a paper towel roll, a toilet paper roll, and a piece of cardboard that used to be part of a box.  We also used a Dixie cup but we took a new one :)

I put the plane together first.  This is my best explanation of what I did....
The toilet paper roll is the main body of the plane.  I cut the Dixie cup down so that only about 1/4 of the bottom was left and stuck it into one end of the roll.  I stuffed some paper into the other end of the roll to hold the cup in place but I only used a little because of the way the wings are placed.  The wings are one long strip of cardboard going through cuts in the middle of the plane.  The tail and the top piece are also cut from cardboard and stuck into cuts in the plane.  The only part that is glued are the propellers on the front.


Then M got to painting (red, of course).  I helped a bit.  It would have been 100% easier to paint each separate piece then put them back together once they were dry but M wouldn't have been as excited to paint his plane if it was in pieces so we did it the hard way...


Here's our finished plane, almost dry and ready to be hung....


Thursday, August 8, 2013

milk cap container

M loves putting money into piggy banks, which is good since he has quite a collection of them.  This activity is one we've had for a while and that M has used several times without getting tired of it.  We keep it in his restaurant backpack so he can play with it whenever we're out somewhere.  We brought it on our Philadelphia trip as well.

You need a container with a plastic lid (we used Gerber crunchies but anything with a removable plastic lid would work) and milk caps.  We get our milk delivered and the caps are a little bigger than the caps from regular milk jugs.  At 2, M has a mixture of both in his collection and does great with them but the big ones might be better for smaller hands.

There's a rectangle cut in the lid, big enough to fit the largest caps.  I went around our cut-out with painter's tape to soften the edges.  M's job is to fill his container with the tops.  He's pretty independent with it now because he's learning to remove the cover to get them out again when he's done.


Monday, August 5, 2013

stained glass window

This is an activity I've been meaning to try for a while but I never had clear contact paper on hand. This weekend we bought some for another DIY project for the baby's room so we were able to get this in as well. 

All you need for this activity is clear contact paper and small pieces of some other type of paper. We used construction paper because it was what we had. I think tissue paper would look really neat and give more of a stained glass look but this worked fine too. 

Hang the contact paper sticky side out on a window. We used our slider which worked well because I could put the paper lower for M. Cut or rip the other paper into small pieces then stick it on. 


M took it upon himself to name some shapes as he went, which I wasn't even expecting.  As we worked I thought it would be neat to have pieces cut as specific things that could make a scene (like animal/barn/tractor pieces to make a farm scene).  That would obviously take more prep on my part (as it was we did this kind of on the fly this morning) but I think M would really like it. 

All finished:

Thursday, July 18, 2013

animal handprint book

This pregnant mom has not been loving the 90 degree heatwave.  Even in a pool I'm not thrilled to be outside.  It makes me feel bad for M, who loves anything to do with being outdoors, so I've been trying to come up with some new and fun air conditioned indoor activities for us to try.

As I've said before, M loves art, especially painting.  This was a fun one for us because he got to paint in between making handprints and we got a fun book to read at the end.  While doing this I felt a little guilty pushing a "school activity" on him - this could really be seen as toddler writer's workshop.  However, he seemed to enjoy it so I'll make books with him while I can get away with it.

We started by doing about ten handprints of different colors.  Each one on it's own sheet of paper (we used small paper we had).  If you Google "handprint animals" you'll find plenty of ideas.  Once they dried we added googly eyes (M liked sticking them on then pulling them off then sticking them on) and I helped with a few details to make them into animals.  Then the writer's workshop part (guilty) - M came up with every sentence in this book.  I wrote them.

We ended up with an elephant, chicken, duck, giraffe, octopus, fish, monkey, alligator, pig, and horse.


M decorated the cover...


On another note, this is our 50th blog post on this blog.  Whether you check out every entry or are just visiting, thanks for reading.  We hope you've found something here that you've enjoyed doing as much as we have :)


M's top 5 travel activities

We recently went on a road trip to Philadelphia.  It was M's first big trip in the car longer than a couple hour (it took around 6).  I packed an activity bag for M.  Some things were regular toys and some things were activities I made.  I googled a lot of "traveling with a toddler" type phrases in the weeks before we went so I thought we'd add to the info that's out there by listing the top 5 things that kept M busy at just over 2 years old....

#5
By the time we got to New Jersey M had done an amazing job in the car but I could tell he had a little extra energy to get out by then.  This is about as simple as it gets....a block of styrofoam, golf tees, and a toy hammer.  He loved it....


#4
M's favorite toys are trucks, trains, and buses.  This was no different in the car.  He was happy to drive some small trucks around his car seat.  At home M usually chooses to play with larger trucks (like his Little People bus) but I put some smaller ones away about a week or so before.  He hadn't seen them in a while which made him happier to play with them.

#3
One of the blogs I came across while searching for ideas offered this color game that I knew M would love.  He loves little figures and putting things into other things.  These wooden peg people and cups (I think the label called them candle holders) are fairly cheap at craft stores.  I painted them one day and gave them faces with a marker.  M loved putting them in their cups (or "houses" as he called them).  He's pretty solid with his colors now but it served as a good color activity too.  The picture isn't great but it gives you an idea...


#2 Books and Movies
I bought a few brand new books M had never seen before, which were great for both the car and at night in the hotel.  M is not huge on TV or movies.  Don't get me wrong, he loves a good Caillou episode and is in love with the Toy Story movies.  However, if it's on in our house, he's usually playing, catching a glimpse now and then, but never really glued to it.  That being said, the iPad, loaded with movies and various videos ripped from Youtube, was a great thing to have.  While I continue to promise to never be a parent who has a full time screen in their vehicle, it was definitely a must for a trip like that.

#1
My child has amazed and surprised me countless times in the last two years.  This road trip was no exception.  The thing that amused M the most and that he enjoyed most was sitting in his car seat and looking out the window.  He loved all the trucks and buses on the highway.  He loved going under all the bridges in New York and calling them tunnels.  He even loved sitting in traffic on the New Jersey Turnpike and watching the "diggers" doing construction.  He turned out to be an awesome traveler.

* I didn't want to buy much for this trip but we did purchase this travel tray at Babies 'R Us.  While there are definitely things I didn't love about this particular one, something like it is definitely a must for a long trip.  So glad we had it.

Wednesday, July 10, 2013

nursery decor

In this blog post from June I explained the rag rug I was making for Baby G's room.  It's finished now and so are a few other DIY items we made for her nursery.  When I was pinning things to my Baby G Pinterest board I found about $200 worth of Etsy items I wanted for her nursery.  Then I realized I could make most of them.  So this is my Etsy rip-off blog.  My apologies to those merchants whose ideas I stole.  If I was rich I would have definitely paid them all to do the work for me.

Rag rug-
There's a longer explanation here but basically the rag rug is strips of material tied into a no-slip rug mat.  As I mentioned in my first blog about it, the woman whose instructions I used didn't tie the pieces.  I did because
1. I have a two year old who I could just picture pulling out the pieces one by one.
2. I thought it looked better.
Our rag rug ended up being 3 feet by about 4 1/2 feet.  I would guess that it took about 20 yards of fabric.  I ended up buying 22 all together but had some left over at the end.  This rug took a lot of time. I would cut about 100 strips at a time then be really surprised at how little of the mat they took up.  I probably used up about 3 weeks of nap times and night times doing this.  However, I love this rug and the look it gives to the nursery so I would definitely do it again.  It ended up costing about $100 in the end (fabric is expensive, who knew?), but the alternate area rug I was considering from Pottery Barn was over $400 so I guess it's a win.


Mobile-
This was an Etsy item and I have to say that this Etsy store has a wide variety of this type of mobile, with all different shapes, so it's definitely worth checking out.  M's dad used a wire hanger to make a hoop to start with.  I bought cheap ribbon and tied 1-2 inch pieces around the hoop.  Then I ordered die cut stars for relatively cheap from this Etsy store.  The owner was super nice and helpful in giving me the right number of each color that I needed.  I also wanted to include moons but couldn't find them anywhere and couldn't cut them free-handed, so it ended up being stars only.  The stars are glued back to back with clear fishing line through the middle.  I was initially worried that the fishing line wouldn't straighten out.  It had a curl when I cut it from the reel.  Once the stars were added it hung perfectly straight.  The hardest part was finding an empty mobile hanger (Amazon).


Moon and stars-
I take very little credit for this one because I sent the Etsy link for this one to M's dad and he bought the wood, made himself a stencil, and cut out the pieces.  I painted them with acrylic glitter paint.  Love these.
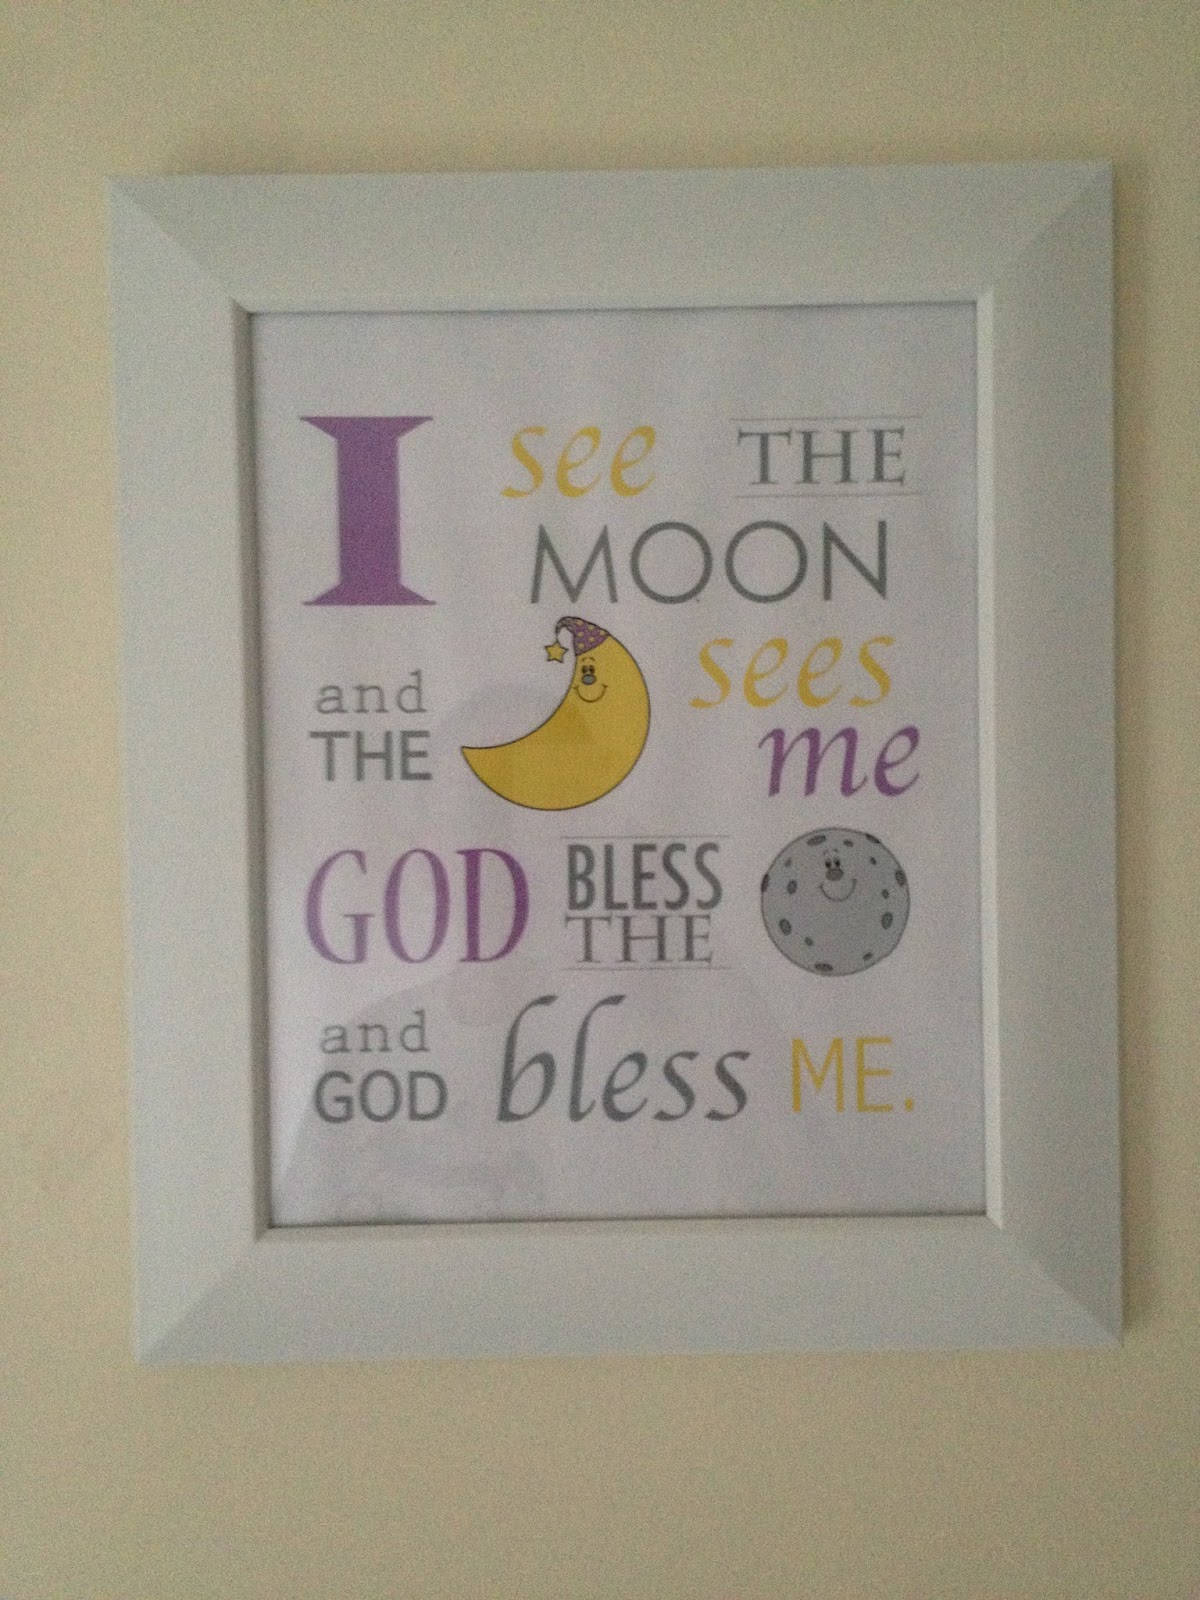


Framed quotes-
These are the easiest DIY pieces I did.  They're a book (Goodnight Moon) quote and a children's prayer typed in Photoshop and printed on card stock.  Idea came from a few stick on wall decals I found.  I'm not a huge fan of wall stickers so we went with frames.


I still have a few things I'm looking for ideas for.  A while back I made this lampshade for M's room and I've been searching for one for G's room without any luck so far.  Her room still has a ways to go.  Even though the picture below looks good the other side of the room is currently decorated with half-unpacked boxes and bins so this won't be the last "G's room post."  I hope these ideas are helpful to a few people because I love how this room is coming along.  Picture my yet-to-be-started lamp on the nightstand :)


Monday, July 8, 2013

simple birdfeeder

Yesterday we tried an idea I found in a parenting magazine (can't remember which one) while I was waiting at my OB's office.  The article was summer activity ideas for different age groups.  This was actually in the 3-5 year old column but M enjoyed it and was excited to put it outside for the birds yesterday.  M needed a lot of help with it but a child a little older than him could do it on their own.

It's pretty simple and fairly quick and easy.  You need a pipe cleaner (we used two) and Cheerios (which are always in our house).  You have to string the Cheerios onto the pipe cleaner then fasten it into a loop to hang it.  M put on a lot of Cheerios so we made our loop then attached a second pipe cleaner to hang it from.  It's fantastic for fine motor skills and I was actually surprised with how well M could get those Cheerios on if I held the pipe cleaner very still for him.  His only problem was wanting to put 5 or 6 on at once but we able to say that each Cheerio needed to "take it's turn" which another thing we need a lot of reminders for so it worked out.  There really isn't much more to it than that.  Here are a few pictures....


Finished product- we added the extra pipe cleaner through the little loop at the top to attach it to our deck:


Friday, June 21, 2013

ice boats

We celebrated the first day of summer today with ice boats in our kiddie pool.  This activity was a huge success with M and one that we will definitely do again.

Directions:
- Tape the short end of a flexi-straw to the bottom of a Solo cup so that the tall end stands up straight in the middle of the cup.
- Fill the cup 1/3 of the way with water and freeze (ours froze overnight).


- Once completely frozen cut the cup away from the straw.  I also read that you could loosen the ice by running warm water on the outside of the cup but I found it pretty easy to just cut the cup and slip it right off.
- Use a hole punch to make a sail for each boat.  We used construction paper.  After the fact I thought it would be cute to have had him decorate the sails but they get wet and ruined fairly quickly.

M was really excited to put them in the water and we liked sailing them back and forth and sending them down M's pool slide.  As I said, the sails were soaked within a minute or so and slumped but M didn't care and eventually just pulled them off.  The straw was great because he could use it to move the boat around without grabbing the ice every time.  

The weather wasn't overly hot today but warm enough for this activity.  That was probably in our favor because I could see these melting super fast on a very hot day.  Ours lasted maybe 10 minutes each today.  I made two and we played with one at a time because, of course, after the first melted M was asking for more.  M actually seemed to enjoy them most once they melted a bit and were smaller.  He's a big fan of throwing things (balls, rocks, etc.) into water so he had tons of fun throwing the smaller ice chunks into the water then finding them.  This was a great activity for summer and one that definitely gave me some ideas for other things to try this summer!