Showing posts with label painting. Show all posts

Monday, September 30, 2013

magnetic pumpkin

We're starting our Halloween activities a little early (is it still September?) because our Baby G countdown is on and with her due date a week before Halloween, it's hard to know what we'll get in towards the actual day.

This is our first Halloween/pumpkin activity.  We have a few others here from last year that M could completely do again this year at 2.  We started this activity last week when we painted our paper pumpkin orange.  I was going to use orange construction paper but M loves to paint so I thought he'd enjoy that more.  I also used a sheet of black craft foam to cut the jack o'lantern pieces.  Each piece then had a magnetic strip attached to the back.

We taped the pumpkin to the fridge and stuck the pieces on the fridge next to it.  I made a face to start and M caught right on...


M had already done a pretty good job of giving a real pumpkin a face with his Nonni last week so this worked out well.  He liked changing the pieces.  I ended up making about 4 interchangeable sets of  face pieces.  I almost didn't put them all out because I could picture them all over the floor but so far that hasn't been a problem.  Another benefit- shapes.  M knows a few and likes naming them - win win.


Wednesday, August 14, 2013

recycled airplane

M and I raided the recycling bin this morning to find pieces to make an airplane.  I've been meaning to buy some real toy airplanes (like these) to hang from M's ceiling in his room but haven't gotten around to it yet.  This morning we made one of our own completely from recycled stuff.

M had fun looking through the cardboard pieces in the bin, pulling them out, and putting them back in. We ended up taking out a paper towel roll, a toilet paper roll, and a piece of cardboard that used to be part of a box.  We also used a Dixie cup but we took a new one :)

I put the plane together first.  This is my best explanation of what I did....
The toilet paper roll is the main body of the plane.  I cut the Dixie cup down so that only about 1/4 of the bottom was left and stuck it into one end of the roll.  I stuffed some paper into the other end of the roll to hold the cup in place but I only used a little because of the way the wings are placed.  The wings are one long strip of cardboard going through cuts in the middle of the plane.  The tail and the top piece are also cut from cardboard and stuck into cuts in the plane.  The only part that is glued are the propellers on the front.


Then M got to painting (red, of course).  I helped a bit.  It would have been 100% easier to paint each separate piece then put them back together once they were dry but M wouldn't have been as excited to paint his plane if it was in pieces so we did it the hard way...


Here's our finished plane, almost dry and ready to be hung....


Thursday, March 7, 2013

egg carton caterpillar

This is an oldie but a goodie so I'll keep it brief....

Take an old egg carton and cut it in half.  Turn it upside down and paint/decorate it.  We used our favorite Crayola paint:


Our My favorite part of painting these days is that we use one color at a time and M has to tell me the color word for the new color he wants to use.  His favorite colors are blue and red so even though he can say all the colors, he typically will tell me that everything is either blue or red - except when we're painting and he has a real reason to tell me the right color!

Anyway, let the caterpillar dry then add eyes and a pipe cleaner antenna :


Monday, February 11, 2013

Valentines

M doesn't go to daycare so we didn't have any little friends to make Valentines for this year.  Instead, we made some for a few of our relatives.  These were fairly easy to do and M had a pretty good role in helping to make them, which is always my goal.

We started by gathering a bunch of our pink and red construction paper sheets and painting them.


Next I traced M's hands on cardboard and cut out several of each hand from the paintings he made:

 Last, I cut out some hearts and glued a left and right hand onto the heart.  We had extra hearts so I made a decoration for the door to our basement as well.  We tend to hang a lot of M's art there:


On the back of each I wrote them out and then M "signed" them with crayon.  There's always something I don't get a picture of!

Friday, August 31, 2012

water painting

I was planning to save this idea for next week but with today's warm weather I decided we'd try it. We've painted a few different ways now. M has used a paintbrush before (see our garden pets entry). Water painting was a great way to let him practice more with a paintbrush and to cool off a little in the warm weather.
We used water, a few paintbrushes, and construction paper for this activity. Basically M "painted" the construction paper with the water instead of paint.  For the first 10 minutes M was happy to stir the water with his brush.

Once he got the hang of it he had fun.  We even made some hand prints after M stuck his hand in the cup.  He made a lot of dots and splatters.

The neat thing was the construction paper held up to a lot of water.  Even when the cup was dumped on one piece.

I'll admit I failed at this project in the beginning.  We first tried this on our porch (bad idea, wet carpet) with a rather full cup of water (um, not sure what I was thinking).  Much better out on the deck with a half-full cup.  It was plenty of water until it got dumped.  However, I think the dumping just made it more fun for M.  You can do this on pavement or wood surfaces too - basically anywhere that water will show up darker.  


Thursday, June 21, 2012

ice cube painting

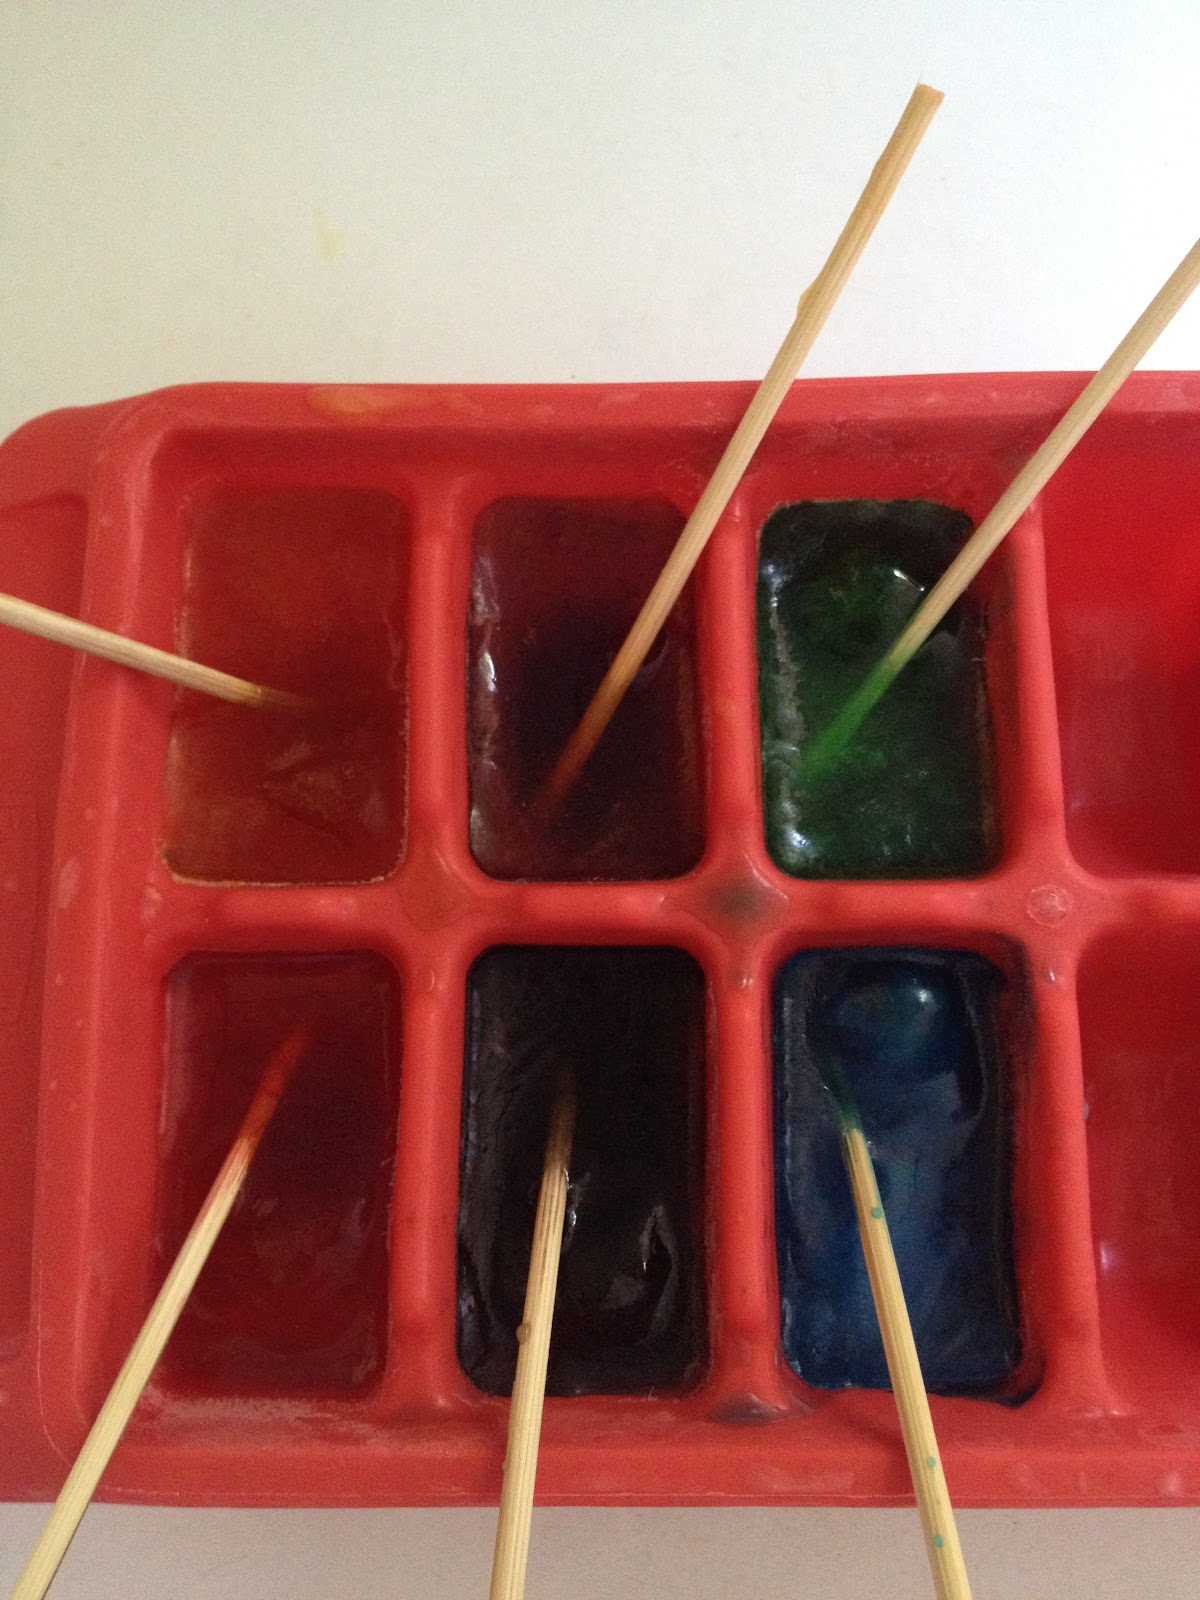
Today M and I tried painting with ice cubes.  It was a great activity for this week since the weather has been so hot.


To make the "paints" I mixed water with food coloring and then froze it in an ice cube tray.  Putting sticks into the cubes keeps the mess down (less on hands) and makes it easier to paint with the cubes because you don't need to hold them.  Popsicle sticks would be good.  I didn't have any so I broke wooden skewers in half and used those.

M loved this activity.  He had no problem holding onto the sticks and had good control over the cubes. He didn't want to stop and I had to pry them out of the hands when they had melted too much. 

When we do this again I'd do it outside in the shade.  Although with a younger toddler like M the high chair was great for containing the mess.  I'd also keep some of the cubes in the freezer and take them out as the others melted.  On a hot day they melt quick!

M's age when we played: 12 months, 1 week


Wednesday, May 2, 2012

finger painting

I had tried getting Miles to "color" using crayons a few times in the past month.  He doesn't have a lot of interest yet and was happier to try to eat the crayons.  From a selfish mommy perspective I was really looking forward to some art on the fridge :)
I read about edible finger painting before and tried one recipe that was corn starch based.  I must have mixed it wrong because it came out more like a cross between jell-o and play-doh.  So then I decided to go simple and just use a small amount of food coloring to dye the vanilla yogurt he loves.  I was a little paranoid about his fingers being stained but that didn't happen.  I also used the moving tape we currently have in surplus to tape down the paper because I knew it would be tossed on the floor if I didn't.


To my surprise once he figured it out he was much more interested in "painting" than eating.  He also enjoyed watching me "write" his name in the paint.


Why we loved edible finger painting....
baby: he got to make a huge mess that tasted delicious
mommy: we finally made some art!  

M's age when we played: 10 months, 3 weeks

Tuesday, September 20, 2011

christening favors

Every holiday season in first grade we make snowman ornaments with the kids' handprints.  
When I was thinking of what to do as favors for M's baptism reception party I thought of these ornaments (minus the snowmen).  After a few attempts of making one handprint with a tiny fisted-up hand I decided making 30 would be impossible so I shifted gears and painted M's foot.  I found that mess-ups were easily wiped off the balls with a wet wipe.  We were able to get 30 nice footprints and our guests loved the finished products!