Showing posts with label home decor. Show all posts

Wednesday, November 13, 2013

sibling handprints

A few weeks ago, while we were waiting for Baby G to arrive, we started this project. I mentioned it in this post.  Two weeks ago G joined us and since then we've finished it. 

I've said before that newborn handprints are pretty elusive. Back when M was a newborn I changed this idea from hands to feet because (at least my) newborns aren't especially cooperative when it comes to painting hands.  We had to get a handprint for this one though because a hand and a foot would have looked a little funny. Therefore, you'll notice G's handprints are a little smudgy. We got the best we could. 

Here they are; small canvases from any craft store, I think they were BOGO when I bought them at Michael's.  A handprint from M and a handprint from G.  They now each have one hanging in their bedrooms.  G's first art project....

Thursday, June 20, 2013

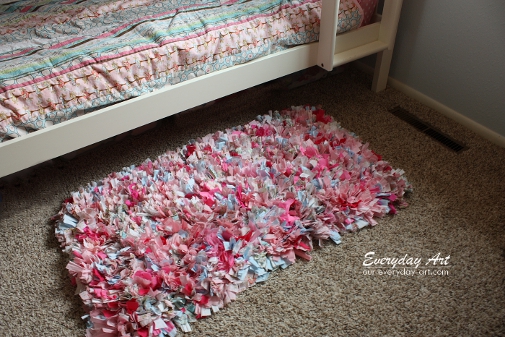
baby G's rug (in progress)

In October M will have a co-star on our blog, his new sister G.  We're just starting to get things ready for G's room and Pinterest is providing lots of great (potential) ideas.  The first attempt I'm making at a DIY item for her room is a rag rug.  There are lots of examples out there but this blog, DIY & Crafts, was the site that provided my inspirational pictures and instructions.  I think the one this mom made is adorable.


In theory, a "rag rug" is supposed to be made of old clothes or other materials you don't need anymore.  I loved the idea of using old baby clothes but Baby G's room colors are yellow, gray, and light purple.  M's old wardrobe pretty much consists of blues, reds, and greens so that didn't really work out.  M and I went to Joann Fabrics and bought material instead.  I've never bought fabric for anything in my life so it was an interesting experience that included picking up and putting back at least ten different fabrics.  I settled on a really soft cotton.  The only downside is that the edges fray a bit when it's cut.  I'm not anywhere near enough of a fabric expert to tell you what kind of material might not do that though.

One of the problems I had was figuring out how much material to buy.  I read various blogs and blog comments from people who had made them and found a lot of different answers.  I ended up buying three yards of each color.

Here's my warning on this project: it's very time consuming.  I've been working on it about one week and I've maybe put in four hours total of work on it.  Here's the current progress:

At least I have 18 weeks left.  The bottom is a non-slip rug mat you'd use under an area rug.  The only thing I'm doing differently than DIY & Crafts is tying the pieces instead of leaving them loose.  The piece of rug mat I bought is about 3 feet by 5 feet.  We'll see if the whole thing gets done or if it gets cut down.  This blog will be updated when it's finished, hopefully before October 24th.

-----------------------------------------------
UPDATE: 6/25
I've gotten through the first 9 yards of fabric and ended up with about 3 feet by a little over 1 1/2 feet of finished rug.  

UPDATE:  Read about the finished rug here.

Tuesday, August 21, 2012

hot wheels lamp

I've needed a lamp for M's room for a while but I haven't been able to find anything just right.  His room started with a bear theme.  As he's accumulated more stuff it's turned into a bear room with trains and sports and dogs and all kinds of other boy things.  At first I was looking for something that either had a bear on it or went with the mostly red/brown/beige colors in his room.  I widened my search and still didn't find anything I liked so I turned to Pinterest.  I've been trying a lot of DIY ideas from Pinterest lately and found some cute lamp ideas.  I decided to go with this one since M loves trucks and cars.  This would be an awesome project to do with a boy in first or second grade as a fun measuring activity.  I did our version slightly different from the original:


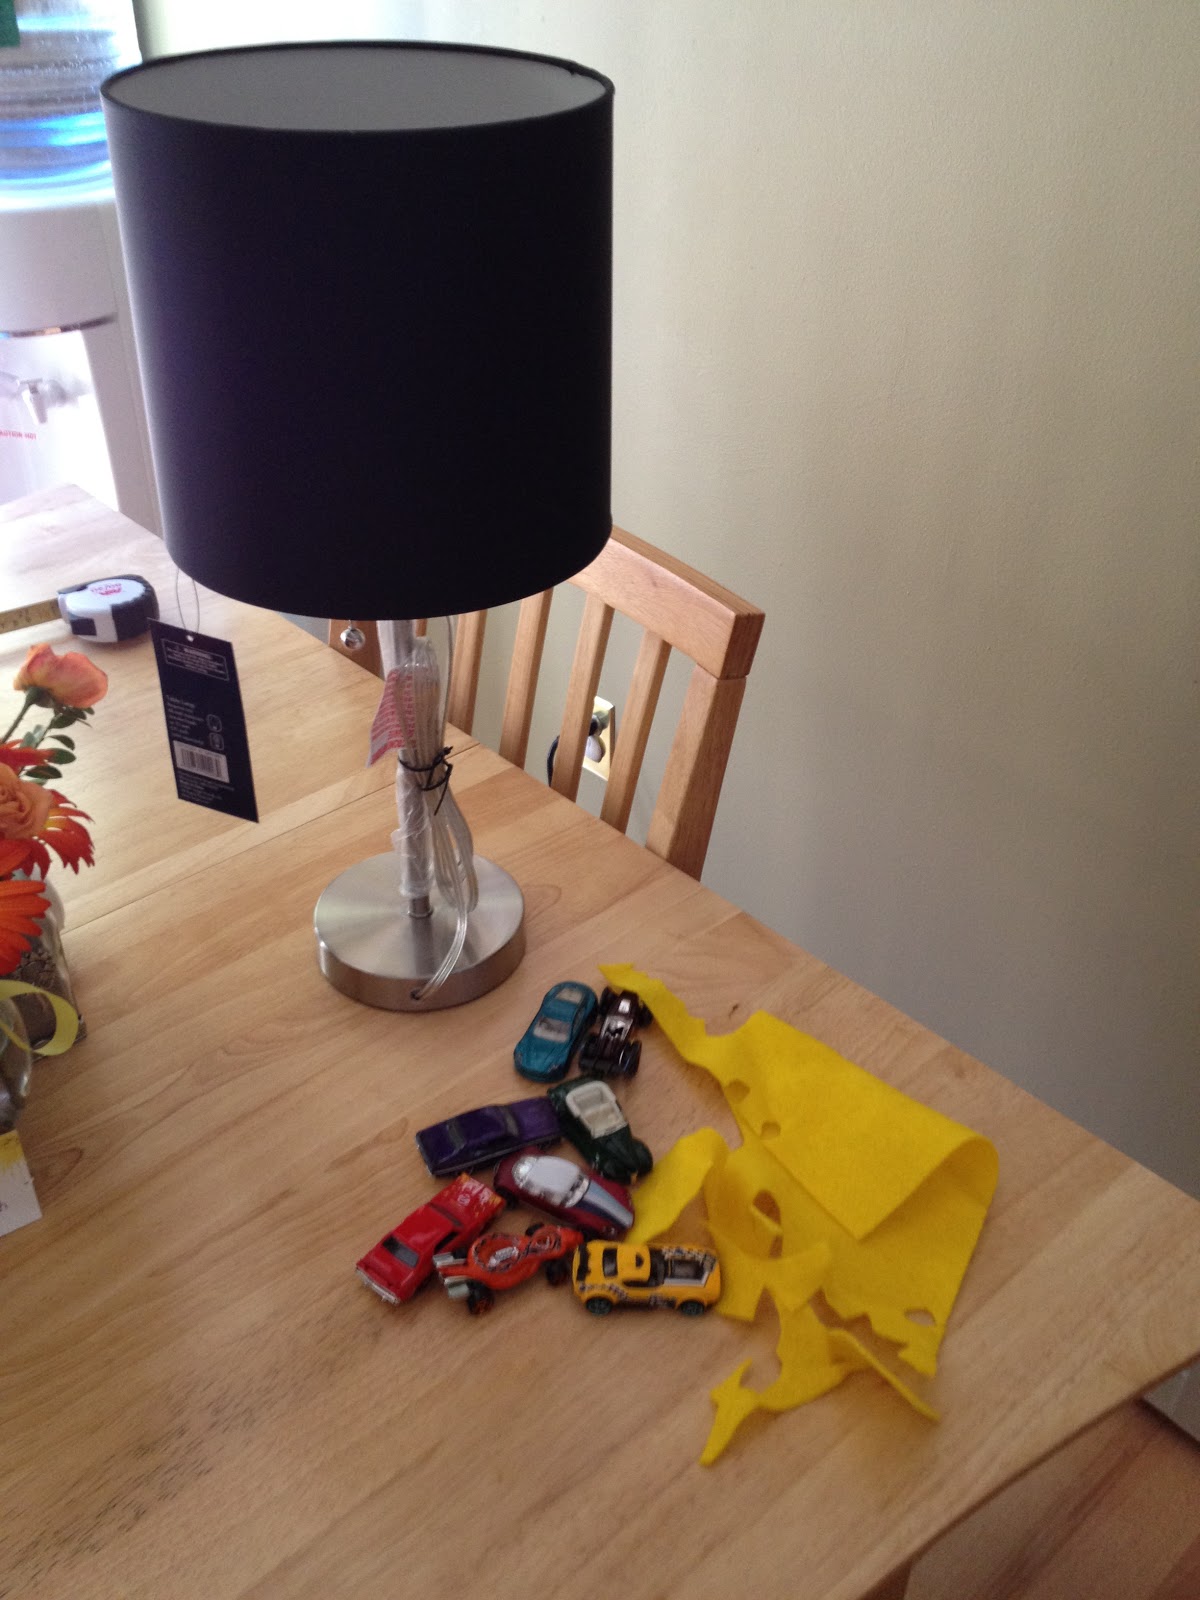
I went to Target and bought the lamp with the black shade and the matchbox cars.  We had some yellow felt left over from our felt board project.

I cut the yellow felt into one-inch strips and placed them one-inch apart on the lamp shade.  Our lamp shade was 28-inches around.  I attached them with hot glue.  

The cars were more difficult to attach.  At first I put hot glue on each wheel and stuck them on.  It didn't hold so I tried coating the whole bottom of the car in hot glue.  I held each car on for about a minute.  This seemed to work well.  There was one orange race car with a thin bottom that was more difficult than the others but eventually it stayed.  

I realize our blog has been missing a lot of "activity" type posts lately.  I have a few things planned that we'll try and share here soon.  But I love these projects and want to share them too!