Showing posts with label nursery. Show all posts

Tuesday, September 3, 2013

end of summer

This week is the last week before I go back to work.  It's also the last summer vacation week (ever) that will be just M and I, as the countdown to Baby G is at about 7 1/2 weeks.  We've had a fun summer and I haven't had a chance to blog all the fun things we've done.  I thought I'd use this entry to add some activities that haven't made the blog yet.  Even though I've made my best effort to make lots of beach, park, and outdoor activities happen, the bottom line is that we've had lots of indoor fun this summer thanks to this pregnancy.  Putting it in writing now so I don't forget in the (long-shot) chance of #3 coming along: a June baby pregnancy is much more weather-friendly than an October baby pregnancy.  Bring on the fall!

Cardboard caves-
M loves tunnels.  Driving through one is especially exciting but since we don't have a whole lot of tunnels around here, he likes making them for his cars, trucks, and trains.  This idea came from M's dad, who saw it on PBSkids.org.  We simply cut a few tunnels out and added some decor.  I could have spent $100 on a Thomas set but I didn't.


Five Little Firefighters book-
This one admittedly took much more effort on my part than M's.  However, I love how much this child loves books and I love how excited he still gets to read his book so we made a second handprint book about firefighters, another of M's favorite topics.  Another thing I love about these books is that they're made up of handprints that won't be that little for long :)
The Five Little Firefighters poem and book idea came from this great website.  The poem is as follows:
Five little firefighters sleeping in a row.
Ring goes the bell, down the pole they go.
They jump on the engine and put out the fire.
Now they're back home, safe but tired.
We love rhyming poems/stories because after two or three readings M gets really good at finishing the rhymes.  He loves "reading" himself.  Here's our version:


Baby G's lamp - 
I posted about the various DIY projects we did for G's room.  At the time, I mentioned needing an idea for a lamp.  I really love the Pinterest-inspired lamp I made for M's room and wanted something just as cute.  This is another Pinterest-inspired lamp shade idea from a Disney-sponsored website.  
G's room theme is moons and stars in yellow and light purple with a bit of gray.  I traced stars on contact paper and then stuck them to a white lamp shade.  Then I used cosmetic sponges to sponge the paint around the stars.  The paint was watered down to help it absorb better to the lamp shade.  After it dried, the contact paper was taken off.

In addition to DIY pieces for the nursery, I did a lot of Etsy shopping.  As soon as we found out G was a girl, one of the first items I ordered was a letter G for her bedroom door from the Etsy shop, Posh Dots.  When M was born I ordered an M for his door to match the teddy bear theme of his nursery.  Even though his room has since transformed into a sports-theme, his teddy bear M still hangs on his door and will until he makes me take it down.  Here are the M and G, both custom orders, both done exactly how I had hoped:


Wednesday, July 10, 2013

nursery decor

In this blog post from June I explained the rag rug I was making for Baby G's room.  It's finished now and so are a few other DIY items we made for her nursery.  When I was pinning things to my Baby G Pinterest board I found about $200 worth of Etsy items I wanted for her nursery.  Then I realized I could make most of them.  So this is my Etsy rip-off blog.  My apologies to those merchants whose ideas I stole.  If I was rich I would have definitely paid them all to do the work for me.

Rag rug-
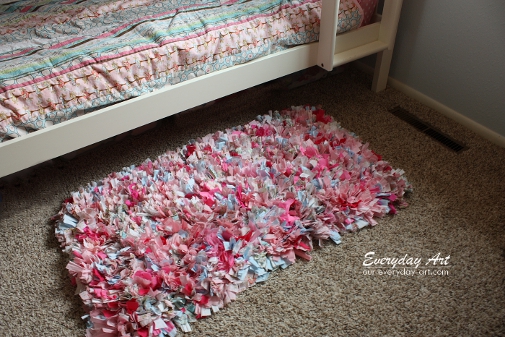
There's a longer explanation here but basically the rag rug is strips of material tied into a no-slip rug mat.  As I mentioned in my first blog about it, the woman whose instructions I used didn't tie the pieces.  I did because
1. I have a two year old who I could just picture pulling out the pieces one by one.
2. I thought it looked better.
Our rag rug ended up being 3 feet by about 4 1/2 feet.  I would guess that it took about 20 yards of fabric.  I ended up buying 22 all together but had some left over at the end.  This rug took a lot of time. I would cut about 100 strips at a time then be really surprised at how little of the mat they took up.  I probably used up about 3 weeks of nap times and night times doing this.  However, I love this rug and the look it gives to the nursery so I would definitely do it again.  It ended up costing about $100 in the end (fabric is expensive, who knew?), but the alternate area rug I was considering from Pottery Barn was over $400 so I guess it's a win.


Mobile-
This was an Etsy item and I have to say that this Etsy store has a wide variety of this type of mobile, with all different shapes, so it's definitely worth checking out.  M's dad used a wire hanger to make a hoop to start with.  I bought cheap ribbon and tied 1-2 inch pieces around the hoop.  Then I ordered die cut stars for relatively cheap from this Etsy store.  The owner was super nice and helpful in giving me the right number of each color that I needed.  I also wanted to include moons but couldn't find them anywhere and couldn't cut them free-handed, so it ended up being stars only.  The stars are glued back to back with clear fishing line through the middle.  I was initially worried that the fishing line wouldn't straighten out.  It had a curl when I cut it from the reel.  Once the stars were added it hung perfectly straight.  The hardest part was finding an empty mobile hanger (Amazon).


Moon and stars-
I take very little credit for this one because I sent the Etsy link for this one to M's dad and he bought the wood, made himself a stencil, and cut out the pieces.  I painted them with acrylic glitter paint.  Love these.


Framed quotes-
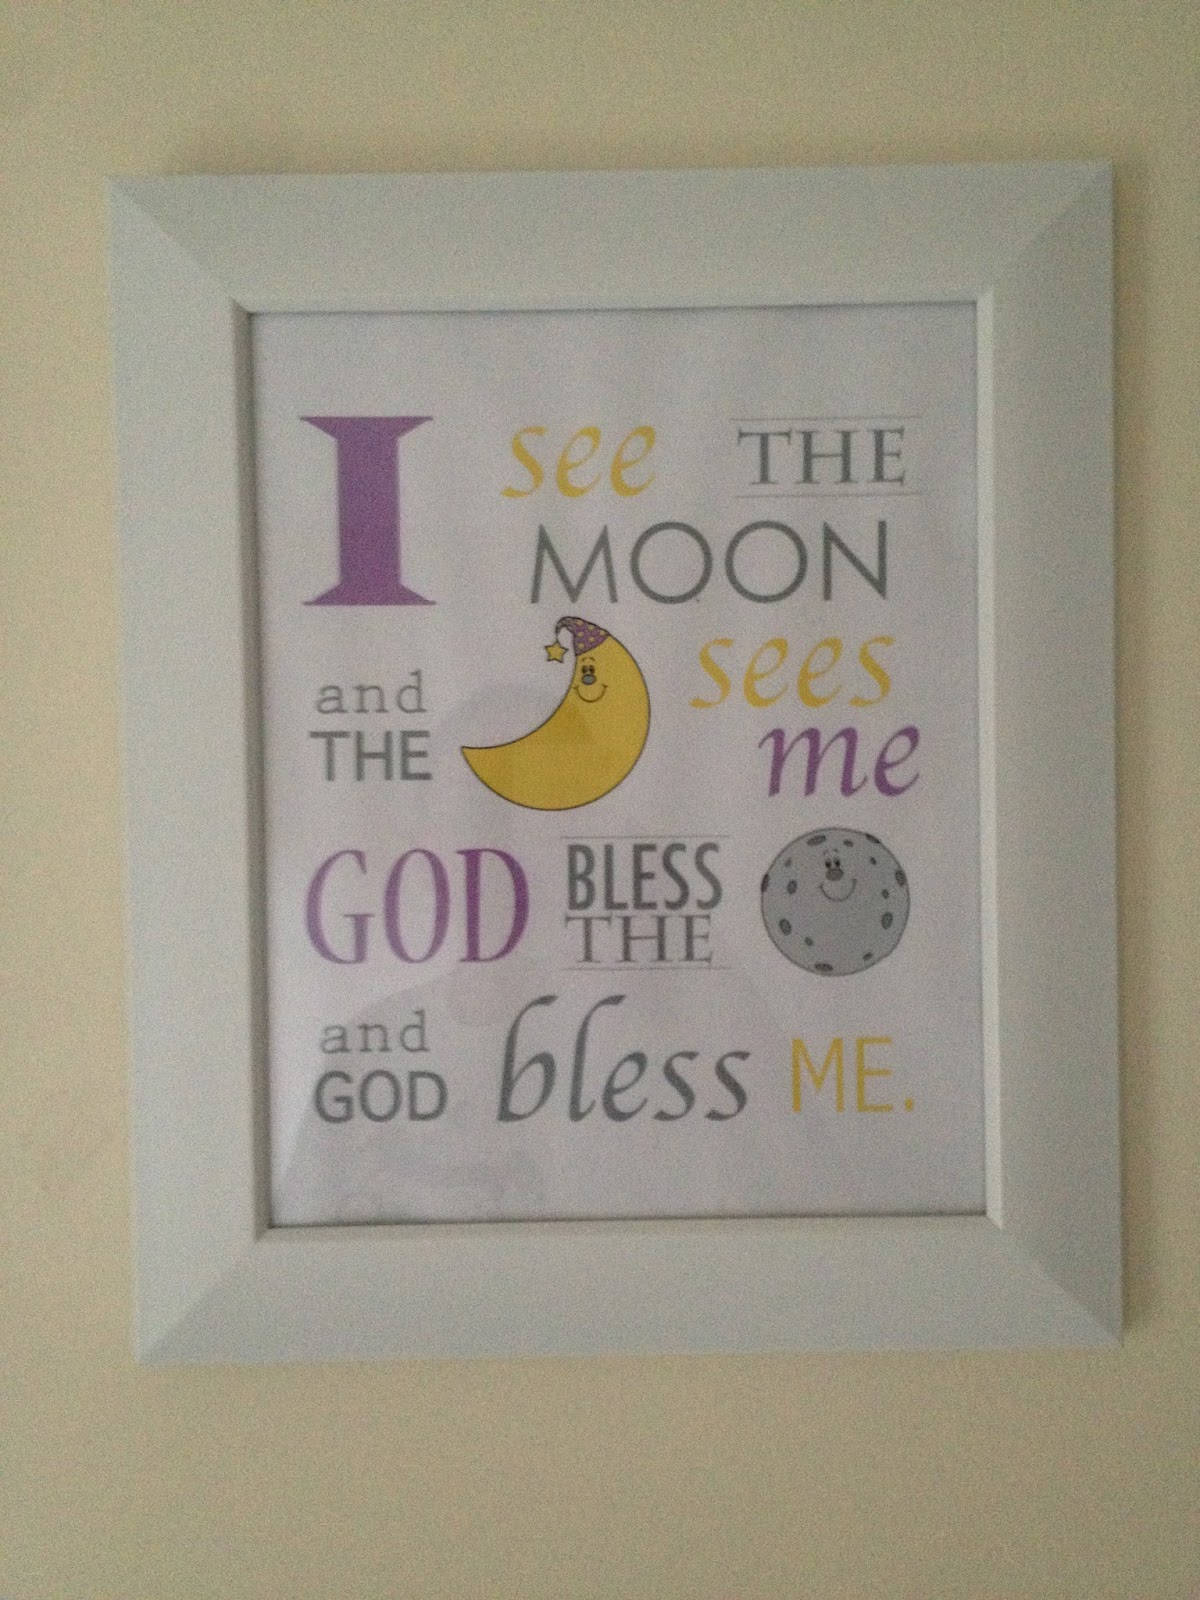
These are the easiest DIY pieces I did.  They're a book (Goodnight Moon) quote and a children's prayer typed in Photoshop and printed on card stock.  Idea came from a few stick on wall decals I found.  I'm not a huge fan of wall stickers so we went with frames.


I still have a few things I'm looking for ideas for.  A while back I made this lampshade for M's room and I've been searching for one for G's room without any luck so far.  Her room still has a ways to go.  Even though the picture below looks good the other side of the room is currently decorated with half-unpacked boxes and bins so this won't be the last "G's room post."  I hope these ideas are helpful to a few people because I love how this room is coming along.  Picture my yet-to-be-started lamp on the nightstand :)


Thursday, June 20, 2013

baby G's rug (in progress)

In October M will have a co-star on our blog, his new sister G.  We're just starting to get things ready for G's room and Pinterest is providing lots of great (potential) ideas.  The first attempt I'm making at a DIY item for her room is a rag rug.  There are lots of examples out there but this blog, DIY & Crafts, was the site that provided my inspirational pictures and instructions.  I think the one this mom made is adorable.


In theory, a "rag rug" is supposed to be made of old clothes or other materials you don't need anymore.  I loved the idea of using old baby clothes but Baby G's room colors are yellow, gray, and light purple.  M's old wardrobe pretty much consists of blues, reds, and greens so that didn't really work out.  M and I went to Joann Fabrics and bought material instead.  I've never bought fabric for anything in my life so it was an interesting experience that included picking up and putting back at least ten different fabrics.  I settled on a really soft cotton.  The only downside is that the edges fray a bit when it's cut.  I'm not anywhere near enough of a fabric expert to tell you what kind of material might not do that though.

One of the problems I had was figuring out how much material to buy.  I read various blogs and blog comments from people who had made them and found a lot of different answers.  I ended up buying three yards of each color.

Here's my warning on this project: it's very time consuming.  I've been working on it about one week and I've maybe put in four hours total of work on it.  Here's the current progress:

At least I have 18 weeks left.  The bottom is a non-slip rug mat you'd use under an area rug.  The only thing I'm doing differently than DIY & Crafts is tying the pieces instead of leaving them loose.  The piece of rug mat I bought is about 3 feet by 5 feet.  We'll see if the whole thing gets done or if it gets cut down.  This blog will be updated when it's finished, hopefully before October 24th.

-----------------------------------------------
UPDATE: 6/25
I've gotten through the first 9 yards of fabric and ended up with about 3 feet by a little over 1 1/2 feet of finished rug.  

UPDATE:  Read about the finished rug here.