Showing posts with label fine motor. Show all posts

Tuesday, February 11, 2014

macaroni valentines

It's Valentine time again. Even though M has yet to start school, we still make Valentines to give to our family. Last year we did a handprint heart. This year we decided to do some macaroni art. 

Before M got involved I painted some macaroni white, pink, and red. I did this by putting them in a Ziplock bag with the paint and shaking them around. Much quicker than painting each one. I let them dry on wax paper. 

I cut hearts out of card stock then cut holes in half of them to serve as picture frames. The ones without holes became the backs. 

We colored with red and pink crayons then added the macaroni with glue (M's current favorite art activity is gluing). They came out cute and we were able to write on the back sides. 

Thursday, August 8, 2013

milk cap container

M loves putting money into piggy banks, which is good since he has quite a collection of them.  This activity is one we've had for a while and that M has used several times without getting tired of it.  We keep it in his restaurant backpack so he can play with it whenever we're out somewhere.  We brought it on our Philadelphia trip as well.

You need a container with a plastic lid (we used Gerber crunchies but anything with a removable plastic lid would work) and milk caps.  We get our milk delivered and the caps are a little bigger than the caps from regular milk jugs.  At 2, M has a mixture of both in his collection and does great with them but the big ones might be better for smaller hands.

There's a rectangle cut in the lid, big enough to fit the largest caps.  I went around our cut-out with painter's tape to soften the edges.  M's job is to fill his container with the tops.  He's pretty independent with it now because he's learning to remove the cover to get them out again when he's done.


Monday, July 8, 2013

simple birdfeeder

Yesterday we tried an idea I found in a parenting magazine (can't remember which one) while I was waiting at my OB's office.  The article was summer activity ideas for different age groups.  This was actually in the 3-5 year old column but M enjoyed it and was excited to put it outside for the birds yesterday.  M needed a lot of help with it but a child a little older than him could do it on their own.

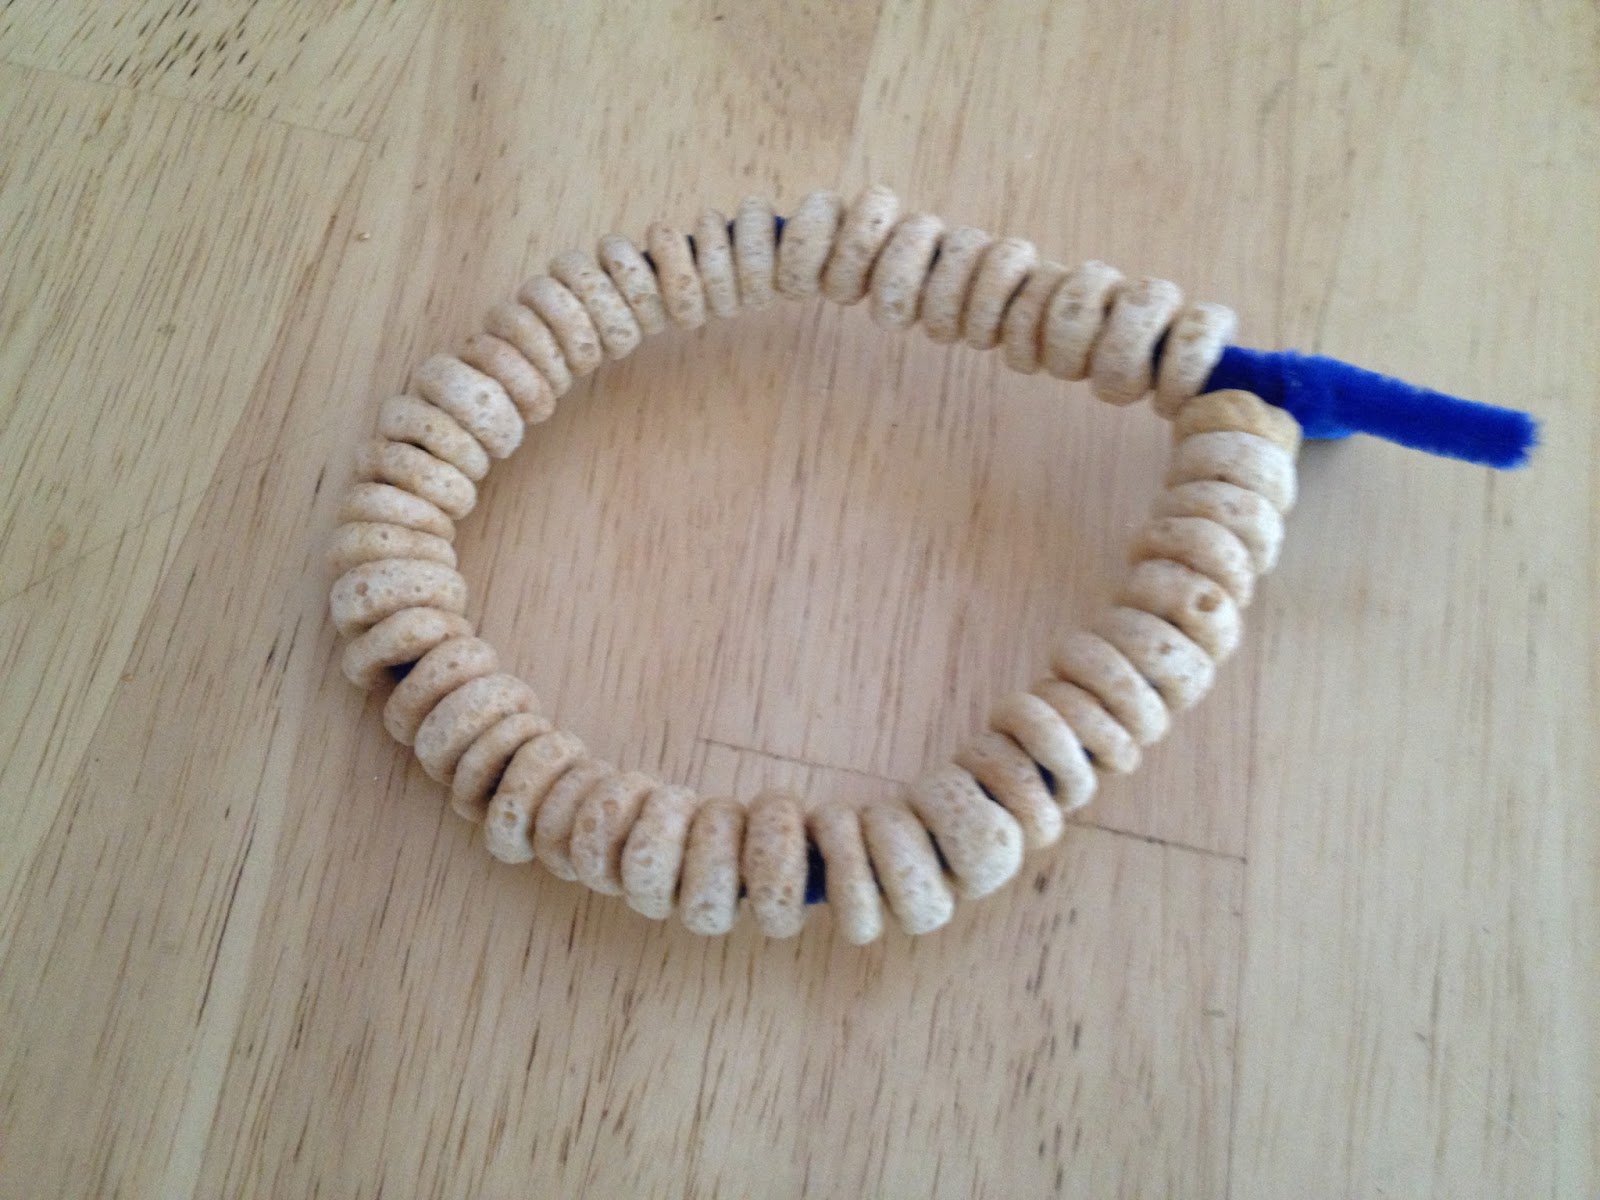
It's pretty simple and fairly quick and easy.  You need a pipe cleaner (we used two) and Cheerios (which are always in our house).  You have to string the Cheerios onto the pipe cleaner then fasten it into a loop to hang it.  M put on a lot of Cheerios so we made our loop then attached a second pipe cleaner to hang it from.  It's fantastic for fine motor skills and I was actually surprised with how well M could get those Cheerios on if I held the pipe cleaner very still for him.  His only problem was wanting to put 5 or 6 on at once but we able to say that each Cheerio needed to "take it's turn" which another thing we need a lot of reminders for so it worked out.  There really isn't much more to it than that.  Here are a few pictures....


Finished product- we added the extra pipe cleaner through the little loop at the top to attach it to our deck:


Friday, June 14, 2013

farm crayon party favors

M turned two this week and we celebrated with a farm-themed party.  I shared a lot of our party decorations from M's first birthday party but I didn't do too many decorations this year.  I did want to share our favor.  We gave M's little friends farm-shaped crayons.  I've seen these done on both Pinterest and Facebook in a variety of shapes and they were pretty easy to make.

I started by ordering the farm-shaped candy mold that included figures of a cow, sheep, horse, and tractor.  I found ours on ebay for under $2.  M had a wide variety of broken crayons so we collected all of them up, took off the wrappers, and broke them into smaller pieces.  I used a sharp knife to cut them small, which isn't completely necessary, but they melt faster.


M liked helping by filling the candy mold with the pieces.  He was more involved than I expected him to be, which was nice.  We filled each mold then baked them at 200 degrees for about 15-20 minutes each.  I'm guessing on the time because I really just kept an eye on them until they were completely melted.  Our candy mold was made of thin plastic (on the cheap side) and it warped after 3 or 4 batches so I would probably turn the oven down to 150 next time if I was using a similar mold.  I have seen some nicer ones that can probably stand the higher heat though.

When they were melted we stuck the whole tray (on a cookie sheet for easier moving) into the fridge to cool.  After about 10 minutes they popped right out of the mold.  The tractors were a little tricky because they had a thin middle section and kept breaking.  We had to overload them with crayon pieces to get them to work.


We got small cellophane favor bags, put a few in each, and attached a "made by M" tag.  M got a set of extras (and rejects) that seem to have held up pretty well.  I've found that he hasn't broken any by coloring with them but some haven't stood up to him throwing or dropping them.  We have a few headless cows around the house.  


I really liked this idea.  I found through searching that candy molds come in a wide variety of shapes (who knew?) so you could potentially make these for almost any occasion.  

Monday, February 11, 2013

magnet cut-outs

This is basically a mom project but M has enjoyed playing with the product so I'm including it here.  I originally intended to make some of these magnet cut-outs of friends M doesn't see all that often.  He loves looking through his photo book and naming people he knows so I thought this would be fun for him too.  I haven't actually gotten to that point yet but I did make some of M and our immediate family. He loves pulling them off the fridge and putting them back on.


I started with these magnetic sheets.  They work just like the magnetic strips except they're 4x6 size so you could just attach a regular sized photograph to make it magnetic:

Next, I cut the picture down and cut a similarly shaped section of the magnetic sheet.  Then I attached it to the magnetic sheet.

I did end up wasting some scraps this way but since the backing of the magnets have one sheet on adhesive this was the best way I could figure to do it.  After the trimmed down photo was on the magnetic sheet, I cut around the people to make the cut-out.  Very easy and a big hit with M!

Monday, December 10, 2012

mix and pour

I loved this activity because the idea came from M.  Every year since I was little my mother and I have decorated a gingerbread house before Christmas.  This year was the first year M could participate.  We did a train instead of a house because he loves trains.  He got really into the decorating, which made it really fun.  However, during the course of the decorating he discovered that he could pour the little candies from one small dish to another (and then into the back of the train).  He ended up totally consumed with pouring the candy into different bowls.

And so we have this pouring and mixing activity....super easy to set up, one of M's favorites, and (maybe) the first independent activity we've had so far.

We started off like this with various bowls and measuring cups.  Some were filled with small snacks (we used Cheerios, banana puffs, and Goldfish).  Leave some empty.


Then M was let loose with them.  He poured and mixed and had lots of fun.  I started off playing with him but then I was able to clean the kitchen up a bit and load the dishwasher while he played quietly by himself.  He had a great time:


Here is my warning: If you don't want a mess of small snack foods on the floor, skip this one.  If my husband had been in the kitchen while we did this it wouldn't have lasted long.  However, we have a great clean up crew that ensured that no Cheerio or Goldfish stayed on the floor for longer than 2 seconds.


If When we do this one again I will give him a spoon to practice scooping.  If you have an older toddler you could get into mixing them together then sorting them back to the original bowls.  You could even use objects like buttons or pom poms or fruit loops if you want to stay edible, and get into sorting by color or size or shape, etc.  


Friday, October 26, 2012

tape paint

It seems that with our new schedule Friday has become our activity day.  Today we tried tape painting. It was one of our most successful activities so far based on the amount of time we spent doing it and M's sadness at having to clean up.

To tape paint you need tape, paint, and paper.  When I first read about it they suggested using finger paint.  We used a brush and it still came out well.  To start make a tape design on the paper.  Letters are easy.  Things with straight lines are easiest.  We did an M.

We used painter's tape and construction paper which turned out to not be the best combination but more on that later.  Once the tape is on you can start painting.  M loved painting today.  He painted the paper...

And I realized this child has had his hand painted for handprints too many times...

We talked a lot about colors while we painted.  M knows the words blue, green, and purple but isn't always right on when matching the words to the colors.  We did one color at a time and I let M choose which ones he wanted to use.  We set up the bottles and he either said what he wanted or pointed.  He was really into it.  Here's what it looked like when he finished:

After a while I peeled off the tape.  This is where the combination of painter's tape and construction paper kind of messed us up.  The painter's tape kind of stuck too much and pulled off some paper with it (if that makes sense).  I think next time Id either use masking tape with the construction paper or a stronger paper with the painter's tape.  It did come out cute though:

I've mentioned these paints before and I have to say how much I love them once again.  They were fabulous for this and wiped right off of M, his socks, his booster seat, and the plastic table cloth on our table.  Love them.


Monday, October 1, 2012

miscellaneous fun

M's daddy was in Chicago this weekend for the Ryder Cup so we tried a few little quick activities over the course of the weekend.  Some were more successful/fun than others but I thought we'd post a bit about each.

Pipe Cleaner Strainer
I'd seen this idea on various blogs and websites I've visited.  You fill the holes of a strainer with pipe cleaners.  It's supposed to be fun to pull them out then try to put them back in.  I say "supposed to be fun" because M found the first part much more entertaining than the second.  He'd never used pipe cleaners before so he had a lot of fun taking them out and inspecting them.  He didn't have as much interest in trying to put them back in.  He found it much more fun to chase the dogs with them.

Sticker Collage
M's had a little experience with stickers in the past but I've never given him a whole sheet of them before.  Nonni brought us some pumpkin stickers so we used them to make a Happy Halloween sign.  At first M was mad when he stuck the stickers to the paper and couldn't get them back off but eventually he got the hang of it.  The trick at the beginning turned out to be providing him with a new sticker as soon as the first was on.  Here's our final product:

Color Sorting
This is my free version of this $30 activity.  M has started to recognize colors, especially when we color with crayons.  I set up three pieces of construction paper (yellow, blue, and red) and we used some of his magnetic letters of the same colors to sort.  M watched me do it then tried it:
To his credit he did do a few on his own.  However, the activity ended shortly after like this:

Card Books
This last one is another mom idea from Pinterest.  If you look for it you'll find a variety of ways to bind together greeting cards into keepsake books.  I am not one to hold on to cards.  I probably have less than 10 saved cards (for me) but I've kept every card M has gotten.  They've been in a box, which seems like a waste, so I took out his first birthday cards and the cards we received right after he was born and made two card books for him.  I found these small 3-ring binders at Staples, which worked great for the cards.  However, if there is such a thing as a small 3-hole punch, I don't have it.  So I ended use a single hole punch to put the cards into the binder.  It was a little more time consuming but it didn't take me more than an hour to make both books - and we had a lot of cards.
Before:
After:


Tuesday, June 5, 2012

sticker hands

A quick little problem solving activity for M this morning....removing stickers from the backs of his hands.  He loved the bright star stickers and didn't mind having them on his hands but (of course) wanted them off so he could play with them.  The first one took him a few minutes to figure out.  He knew he had to pinch it but kept missing the edge.

Once he got the first one off the second one was easy.  And once he unstuck the second one, he stuck it back on (it's still there).
Quick and easy if you have stickers at home.  Good for pincer grasp and fine motor development.

M's age when we played: 11 months, 3 weeks

Friday, June 1, 2012

bowl of jello

The idea for today's activity came from here.  I read about their Gelatin Sensory Tub and wanted to try it. I thought about a slightly different take on it by trying to make jello "blocks" to play with.  I put my jello in ice cube trays to form but the pieces ended up being more floppy that I thought (I guess it's been a while since I've had a jiggler).  We ended up with a sensory tub instead of blocks but we had a lot of fun. The mom on No Time For Flash Cards had a much more appealing array of jello.  We had two colors.  M didn't seem to mind though.
We poked it....
Scooped it....
Squashed it...
M had a lot of fun.  He got to practice holding and handling a spoon (even though he didn't eat any jello).  He also got to practice picking up some not-so-easy-to-handle jello chunks.  We've done a lot of activities that have allowed M to practice his grasp and fine motor skills.  The other day he took one of those small lipstick cases out of his grandmother's purse, opened the button clasp, took out the lipstick, fit it back inside, and buttoned it.  We were kind of impressed.  That's why we do these kinds of crazy things :)
A few tips- make sure you and your child are not wearing anything you don't want ruined.  Even if you don't plan on touching the jello, you will end up with it on you.  Do it on a surface that could be easily hosed down, wiped down, or thrown away.  We used a plastic table cloth.  And finally, only do this if you can handle a mess.  M needed a bath afterwards and anything he inadvertently touched on the way to the tub turned instantly sticky.  Messy but fun.

M's age when we played: 11 months, 3 weeks

Thursday, April 26, 2012

magnetic letter tray

M's new magnetic letter sets came in the mail this week and he's had fun playing with them on the fridge. One of the teachers I work with uses cookie sheets with letter tiles for phonics activities.  This morning we tried a few letters on a cookie sheet.
Why we loved the magnetic letter tray...
baby: pulling the letters off
mommy: exposure to the alphabet, fine motor skills (pulling the letters off the tray), developing pincer grasp, and it gave the letters that have been on the fridge for a few days a more novel appeal

M's age when we played: 10 months, 2 weeks