Wednesday, July 10, 2013

nursery decor

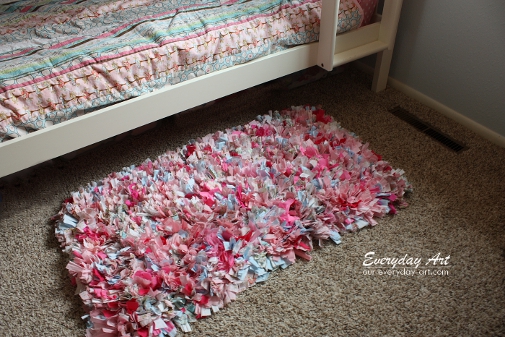
In this blog post from June I explained the rag rug I was making for Baby G's room.  It's finished now and so are a few other DIY items we made for her nursery.  When I was pinning things to my Baby G Pinterest board I found about $200 worth of Etsy items I wanted for her nursery.  Then I realized I could make most of them.  So this is my Etsy rip-off blog.  My apologies to those merchants whose ideas I stole.  If I was rich I would have definitely paid them all to do the work for me.

Rag rug-
There's a longer explanation here but basically the rag rug is strips of material tied into a no-slip rug mat.  As I mentioned in my first blog about it, the woman whose instructions I used didn't tie the pieces.  I did because
1. I have a two year old who I could just picture pulling out the pieces one by one.
2. I thought it looked better.
Our rag rug ended up being 3 feet by about 4 1/2 feet.  I would guess that it took about 20 yards of fabric.  I ended up buying 22 all together but had some left over at the end.  This rug took a lot of time. I would cut about 100 strips at a time then be really surprised at how little of the mat they took up.  I probably used up about 3 weeks of nap times and night times doing this.  However, I love this rug and the look it gives to the nursery so I would definitely do it again.  It ended up costing about $100 in the end (fabric is expensive, who knew?), but the alternate area rug I was considering from Pottery Barn was over $400 so I guess it's a win.


Mobile-
This was an Etsy item and I have to say that this Etsy store has a wide variety of this type of mobile, with all different shapes, so it's definitely worth checking out.  M's dad used a wire hanger to make a hoop to start with.  I bought cheap ribbon and tied 1-2 inch pieces around the hoop.  Then I ordered die cut stars for relatively cheap from this Etsy store.  The owner was super nice and helpful in giving me the right number of each color that I needed.  I also wanted to include moons but couldn't find them anywhere and couldn't cut them free-handed, so it ended up being stars only.  The stars are glued back to back with clear fishing line through the middle.  I was initially worried that the fishing line wouldn't straighten out.  It had a curl when I cut it from the reel.  Once the stars were added it hung perfectly straight.  The hardest part was finding an empty mobile hanger (Amazon).


Moon and stars-
I take very little credit for this one because I sent the Etsy link for this one to M's dad and he bought the wood, made himself a stencil, and cut out the pieces.  I painted them with acrylic glitter paint.  Love these.


Framed quotes-
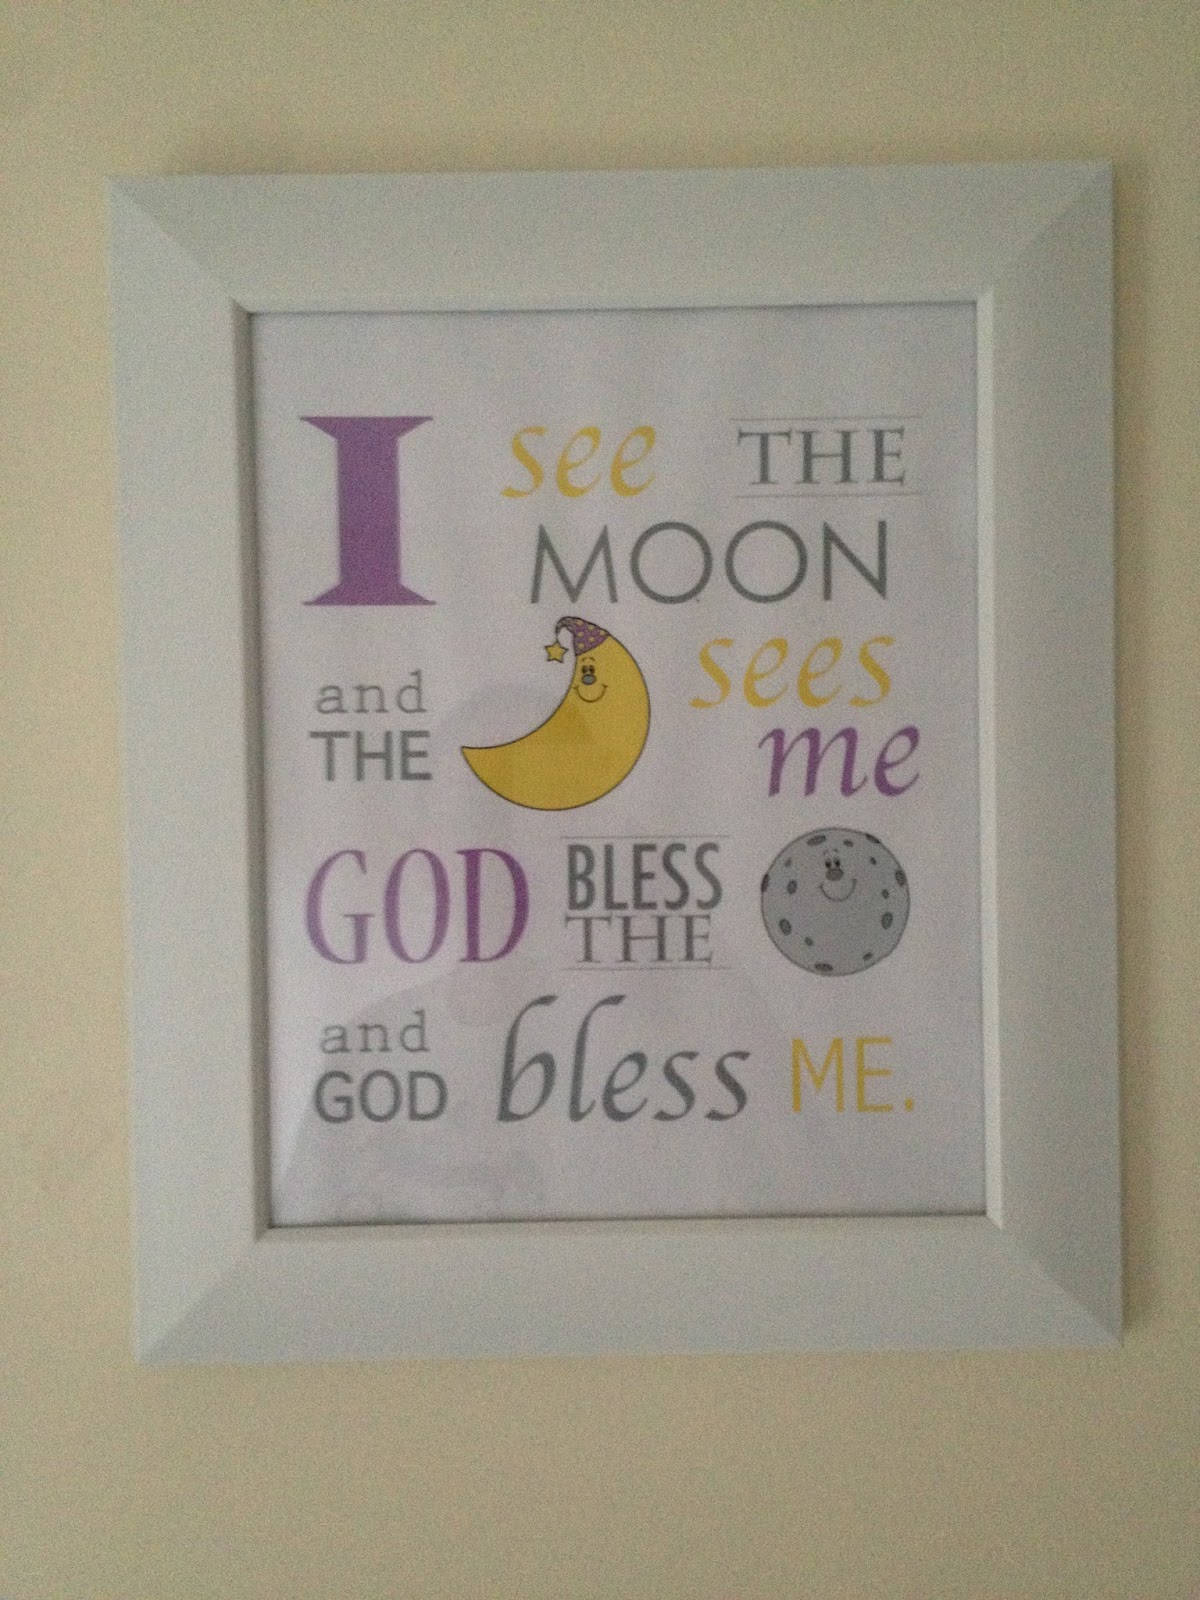
These are the easiest DIY pieces I did.  They're a book (Goodnight Moon) quote and a children's prayer typed in Photoshop and printed on card stock.  Idea came from a few stick on wall decals I found.  I'm not a huge fan of wall stickers so we went with frames.


I still have a few things I'm looking for ideas for.  A while back I made this lampshade for M's room and I've been searching for one for G's room without any luck so far.  Her room still has a ways to go.  Even though the picture below looks good the other side of the room is currently decorated with half-unpacked boxes and bins so this won't be the last "G's room post."  I hope these ideas are helpful to a few people because I love how this room is coming along.  Picture my yet-to-be-started lamp on the nightstand :)


Monday, July 8, 2013

simple birdfeeder

Yesterday we tried an idea I found in a parenting magazine (can't remember which one) while I was waiting at my OB's office.  The article was summer activity ideas for different age groups.  This was actually in the 3-5 year old column but M enjoyed it and was excited to put it outside for the birds yesterday.  M needed a lot of help with it but a child a little older than him could do it on their own.

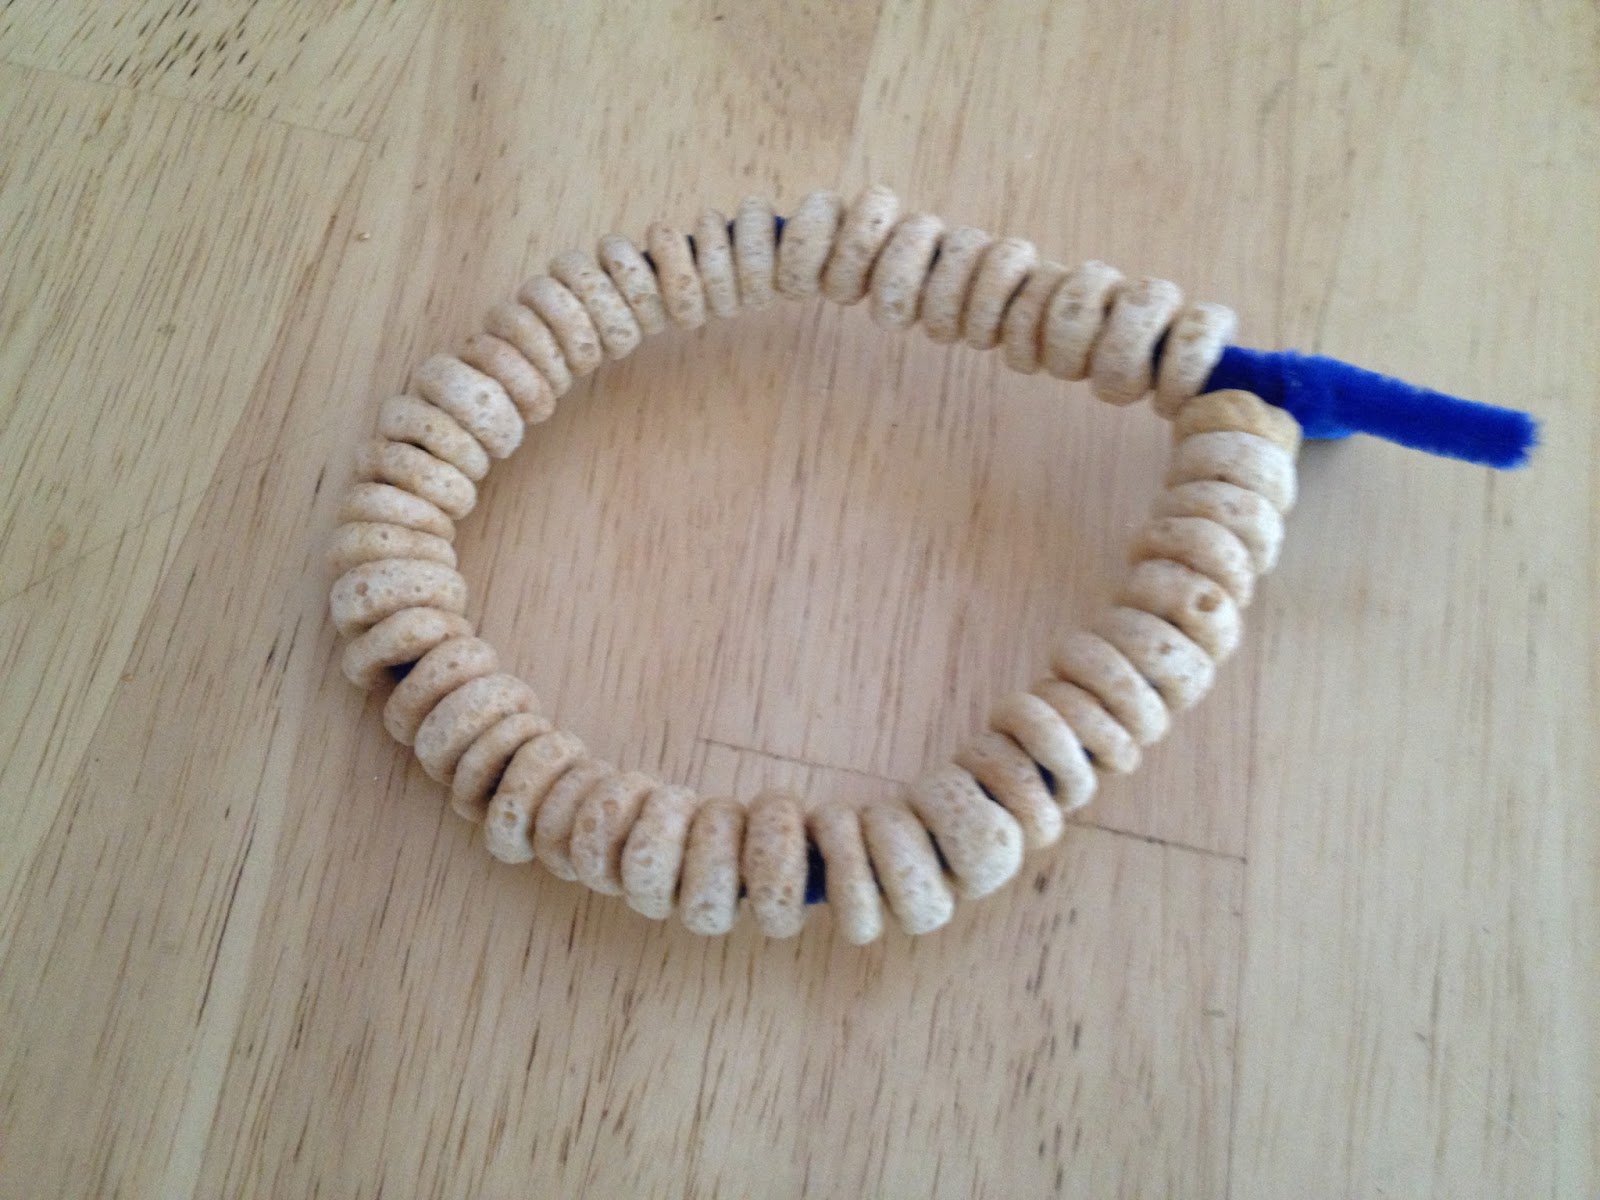
It's pretty simple and fairly quick and easy.  You need a pipe cleaner (we used two) and Cheerios (which are always in our house).  You have to string the Cheerios onto the pipe cleaner then fasten it into a loop to hang it.  M put on a lot of Cheerios so we made our loop then attached a second pipe cleaner to hang it from.  It's fantastic for fine motor skills and I was actually surprised with how well M could get those Cheerios on if I held the pipe cleaner very still for him.  His only problem was wanting to put 5 or 6 on at once but we able to say that each Cheerio needed to "take it's turn" which another thing we need a lot of reminders for so it worked out.  There really isn't much more to it than that.  Here are a few pictures....


Finished product- we added the extra pipe cleaner through the little loop at the top to attach it to our deck:


Friday, June 21, 2013

ice boats

We celebrated the first day of summer today with ice boats in our kiddie pool.  This activity was a huge success with M and one that we will definitely do again.

Directions:
- Tape the short end of a flexi-straw to the bottom of a Solo cup so that the tall end stands up straight in the middle of the cup.
- Fill the cup 1/3 of the way with water and freeze (ours froze overnight).


- Once completely frozen cut the cup away from the straw.  I also read that you could loosen the ice by running warm water on the outside of the cup but I found it pretty easy to just cut the cup and slip it right off.
- Use a hole punch to make a sail for each boat.  We used construction paper.  After the fact I thought it would be cute to have had him decorate the sails but they get wet and ruined fairly quickly.

M was really excited to put them in the water and we liked sailing them back and forth and sending them down M's pool slide.  As I said, the sails were soaked within a minute or so and slumped but M didn't care and eventually just pulled them off.  The straw was great because he could use it to move the boat around without grabbing the ice every time.  

The weather wasn't overly hot today but warm enough for this activity.  That was probably in our favor because I could see these melting super fast on a very hot day.  Ours lasted maybe 10 minutes each today.  I made two and we played with one at a time because, of course, after the first melted M was asking for more.  M actually seemed to enjoy them most once they melted a bit and were smaller.  He's a big fan of throwing things (balls, rocks, etc.) into water so he had tons of fun throwing the smaller ice chunks into the water then finding them.  This was a great activity for summer and one that definitely gave me some ideas for other things to try this summer!


Thursday, June 20, 2013

baby G's rug (in progress)

In October M will have a co-star on our blog, his new sister G.  We're just starting to get things ready for G's room and Pinterest is providing lots of great (potential) ideas.  The first attempt I'm making at a DIY item for her room is a rag rug.  There are lots of examples out there but this blog, DIY & Crafts, was the site that provided my inspirational pictures and instructions.  I think the one this mom made is adorable.


In theory, a "rag rug" is supposed to be made of old clothes or other materials you don't need anymore.  I loved the idea of using old baby clothes but Baby G's room colors are yellow, gray, and light purple.  M's old wardrobe pretty much consists of blues, reds, and greens so that didn't really work out.  M and I went to Joann Fabrics and bought material instead.  I've never bought fabric for anything in my life so it was an interesting experience that included picking up and putting back at least ten different fabrics.  I settled on a really soft cotton.  The only downside is that the edges fray a bit when it's cut.  I'm not anywhere near enough of a fabric expert to tell you what kind of material might not do that though.

One of the problems I had was figuring out how much material to buy.  I read various blogs and blog comments from people who had made them and found a lot of different answers.  I ended up buying three yards of each color.

Here's my warning on this project: it's very time consuming.  I've been working on it about one week and I've maybe put in four hours total of work on it.  Here's the current progress:

At least I have 18 weeks left.  The bottom is a non-slip rug mat you'd use under an area rug.  The only thing I'm doing differently than DIY & Crafts is tying the pieces instead of leaving them loose.  The piece of rug mat I bought is about 3 feet by 5 feet.  We'll see if the whole thing gets done or if it gets cut down.  This blog will be updated when it's finished, hopefully before October 24th.

-----------------------------------------------
UPDATE: 6/25
I've gotten through the first 9 yards of fabric and ended up with about 3 feet by a little over 1 1/2 feet of finished rug.  

UPDATE:  Read about the finished rug here.

Friday, June 14, 2013

farm crayon party favors

M turned two this week and we celebrated with a farm-themed party.  I shared a lot of our party decorations from M's first birthday party but I didn't do too many decorations this year.  I did want to share our favor.  We gave M's little friends farm-shaped crayons.  I've seen these done on both Pinterest and Facebook in a variety of shapes and they were pretty easy to make.

I started by ordering the farm-shaped candy mold that included figures of a cow, sheep, horse, and tractor.  I found ours on ebay for under $2.  M had a wide variety of broken crayons so we collected all of them up, took off the wrappers, and broke them into smaller pieces.  I used a sharp knife to cut them small, which isn't completely necessary, but they melt faster.


M liked helping by filling the candy mold with the pieces.  He was more involved than I expected him to be, which was nice.  We filled each mold then baked them at 200 degrees for about 15-20 minutes each.  I'm guessing on the time because I really just kept an eye on them until they were completely melted.  Our candy mold was made of thin plastic (on the cheap side) and it warped after 3 or 4 batches so I would probably turn the oven down to 150 next time if I was using a similar mold.  I have seen some nicer ones that can probably stand the higher heat though.

When they were melted we stuck the whole tray (on a cookie sheet for easier moving) into the fridge to cool.  After about 10 minutes they popped right out of the mold.  The tractors were a little tricky because they had a thin middle section and kept breaking.  We had to overload them with crayon pieces to get them to work.


We got small cellophane favor bags, put a few in each, and attached a "made by M" tag.  M got a set of extras (and rejects) that seem to have held up pretty well.  I've found that he hasn't broken any by coloring with them but some haven't stood up to him throwing or dropping them.  We have a few headless cows around the house.  


I really liked this idea.  I found through searching that candy molds come in a wide variety of shapes (who knew?) so you could potentially make these for almost any occasion.  

Friday, May 31, 2013

ice cream in a bag

We haven't posted too much lately but summer is coming (seems like it's here today) and M and I already have a long list of fun activities to try in the coming weeks. 
Today we experimented with making our own ice cream using the Ice Cream in a Bag recipe. We used the one from the Disney website but Googling "ice cream in a bag" brings up plenty. 
This is the process:
Mix 1 cup of Half and Half, 2 tablespoons of sugar, and 1/2 teaspoon of vanilla extract in a ziploc bag. In a larger (ours were actually the same size) ziploc bag fill 1/2 way with ice cubes and add 1/2 cup of salt. Then shake the whole thing for about 5 minutes. 

Obviously I prepared it but M enjoyed both shaking the bag and dancing to the sound when I shook the bag. It was a little on the heavy side for him but he managed. 

Ours was done in a little less than 5 minutes. It's pretty easy to tell when it's ready. On the website of one of the recipes I read it showed children eating the ice cream right out of the smaller bag. We put ours in a bowl and added sprinkles because the inside bag comes out covered in salt. I wasn't a huge fan of the taste (maybe less vanilla extract if we do it again) but M liked it!  One other thing- as you can see in the picture it melted rather quickly after coming out of the bag. M didn't mind but I imagine it would melt super fast outside on a hot day. 

Saturday, April 13, 2013

abc book

M has been getting into the ABCs. We've always had a big foam alphabet mat on the floor in his toy corner of the basement. When our dog Skippy had back surgery and couldn't walk on our hardwood floors we had to use a alphabet mat to make him a path through the kitchen. M will try saying the letter names as he walks on it or he'll pull one right out and try to tell me what it is.

One of our first posts on this blog was about M's people book, a simple little photo album with pictures of his family and friends and labels of their names. That's always been one of his favorites. He loves looking at photographs and I've made him various other albums that are "his" that he can pull out to look through. Our newest book is an alphabet book of M's favorite things (and a few people). It's mostly people but also includes some coloring book pictures or magazine pictures (some of those letters are tough!). The most important part is that each picture is of something M can quickly recognize and say the word for. This way, when we look through it I can say, "Z is for..." and he can be part of the reading by saying "zebra."

I bought another cheapie photo album and a pack of scrapbooking letter stickers bringing the cost of this project to probably about $5. M loves it and even though its not done (X ideas welcome, as M doesn't know X-rays yet), we've "read" it several times since yesterday.

Here is a sample page, T is for Thomas: