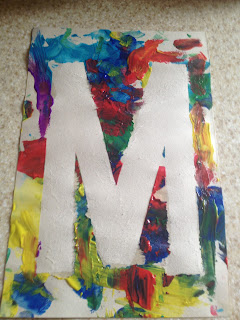
To tape paint you need tape, paint, and paper. When I first read about it they suggested using finger paint. We used a brush and it still came out well. To start make a tape design on the paper. Letters are easy. Things with straight lines are easiest. We did an M.
We used painter's tape and construction paper which turned out to not be the best combination but more on that later. Once the tape is on you can start painting. M loved painting today. He painted the paper...
And I realized this child has had his hand painted for handprints too many times...
We talked a lot about colors while we painted. M knows the words blue, green, and purple but isn't always right on when matching the words to the colors. We did one color at a time and I let M choose which ones he wanted to use. We set up the bottles and he either said what he wanted or pointed. He was really into it. Here's what it looked like when he finished:
After a while I peeled off the tape. This is where the combination of painter's tape and construction paper kind of messed us up. The painter's tape kind of stuck too much and pulled off some paper with it (if that makes sense). I think next time Id either use masking tape with the construction paper or a stronger paper with the painter's tape. It did come out cute though:
I've mentioned these paints before and I have to say how much I love them once again. They were fabulous for this and wiped right off of M, his socks, his booster seat, and the plastic table cloth on our table. Love them.


No comments:
Post a Comment