Showing posts with label footprints. Show all posts

Friday, July 25, 2014

sand prints

I will preface this post by saying that, in my opinion, this idea sucks. You will not find instructions on how to make adorable sand footprints here because I failed at it 5, count them, 5 times. Don't get me wrong, those who have successfully done this have a beautiful little keepsake hanging on their wall. I would love for one of those moms to come to my house and make one of my childrens' feet. 

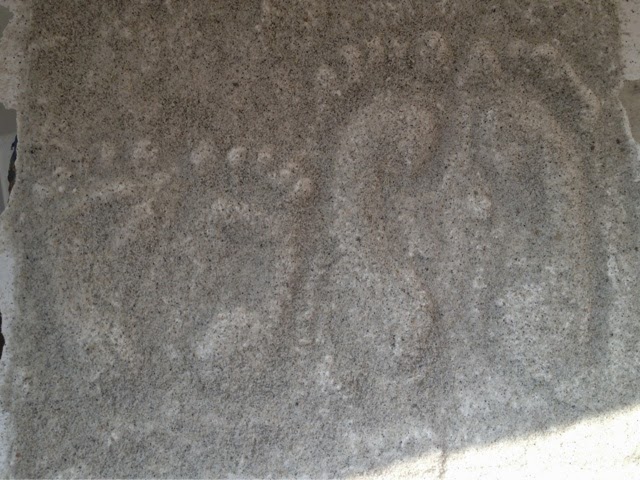
This is a photo of the best of my five attempts. It actually looks better in this photo than it does in person. 

I had a number of problems over the course of five of these. I had cracked plaster, feet with no toes, sand that was too dry then sand that was too wet. I cannot tell you how to successfully do this but I will tell you the theoretical process. I will never, ever attempt this again so if you try it and are successful send me a note giving some hints and I'll post them. 

You need sand, plaster, a clear sealant spray, and a picture frame. 
Remove the glass from the picture frames and put the back of the frame in backwards. 
Fill the frame with sand and have your kid(s) make footprints. Here's a photo of that step. 

Smooth out the sand around the prints and cover in plaster. 
Let it dry completely then flip frame over carefully to remove plaster and sand. 
Brush excess sand off and spray with sealant. You can also add shells to make me really jealous. 

All in all, I wouldn't recommend this at all if the end result wasn't so cute. It's messy and the only interactive part for kids is making the footprint, which isn't much fun. I won't be trying it again but good luck to you if you try it!

Friday, April 18, 2014

easter art

I am very behind on this blog and I know there were some things I missed over the past few months.  Truth is, I'm happy to get this post up before Easter is actually over.  M and I have done a few little projects to get in the Easter spirit, which seemed to be a little overshadowed getting ready for G's baptism.

I love this bunny project because M loved it so much.  Of everything we've ever done, he was so proud of this bunny and asked me to take his picture with it when we were done.  The bunny head is a paper plate, covered in cotton balls.  M loved it because he spread the glue and stuck the cotton on with no help.  The ears are footprints and his bow tie is handprints.  Ideally we would have used googly eyes but drawn on did the trick this year -

Our second bunny is made out of a baby food jar, which we currently have a surplus of (any good baby food jar craft ideas?).  M filled it with cotton and we hot glued on some ears made of felt and pipe cleaners.  M has perched this guy up on our entertainment center so he can watch him.  

All M needs now are some colored eggs and he'll be ready for the real bunny...


Thursday, December 19, 2013

cinnamon ornaments

We've needed lots to keep us busy the past few weeks because it's been cold and snowy.  While M would like nothing more than to be out in the snow all day everyday, we can't do that with baby G hanging out with us now.  So due to G's laid-back nature we've gotten to try out lots of Christmas projects from gingerbread houses to homemade gifts to these fun ideas...

I think these cinnamon ornaments are one of my favorite holiday activities because they're easy to make and always come out cute. They look baked but they're not. In fact, I made them in school one year because it's that easy. 

1/2 cup cinnamon
1/2 cup applesauce
Mix them to make a dough. Roll it out to about 1/4 inch thickness. I rolled it between a piece of parchment paper and a piece of Saran Wrap. Then use cookie cutters to cut shapes. 

Use a straw to poke holes for hanging then let the shapes dry for at least 24 hours. I kept them uncovered on parchment paper and flipped them halfway through. 


Once they're dry they can be decorated and strung to hang. We broke out the glitter glue and puffy paint for this...

-------------------------

While we have lots of time for crafts, I have limited blog-writing time, so I'm including a few other Christmas decorations we've made at the tail end of this blog. 

First, the self-explanatory Christmas tree feet:

And a hand tree. Trace their hands, fold the paper and cut 6 or so out at a time. M loved decorating this with stickers. If I had been more on the ball I would have gotten cute ornament stickers.

Merry Christmas from me, M and G!


Tuesday, August 7, 2012

footprint step stool

This post is a little different from our normal posts because M had little to do with this project.  I wanted to share it though because I think it came out really cute and it was easy to do.  Like a lot of other things, I found the idea on Pinterest.  I was searching for ideas for painting a step stool to put in M's bathroom.  M's bathroom has a monkey theme so originally I was looking for a monkey themed step stool but ended up deciding my freehand monkey painting skills were not quite up to par for that kind of project.  That led me to this idea:

It may not fit the monkey theme but it does match the colors in his bathroom.  Here is how I did it...

I started with an old step stool that has been around at my grandmother's house for a long time.  It was dark blue when we started.  Here is the before picture...

First step was painting it white.  I did two coats of white since it had started pretty dark and I didn't want the dark blue to show through the light blue I was planning to paint it.

The nice thing was that I did the whole project on our deck.  After each coat I let it sit in the sun, which allowed it to dry really quickly.  I was able to space the coats of white out during M's two naps yesterday.  Then later on at night I added the first coat of blue.  I did the second coat of blue this morning.

After lunch we added M's footprints and his name and the year.  I love how it came out and it looks great in his monkey bathroom.  It will end up being perfect for reaching the sink.