Showing posts with label decoration. Show all posts

Friday, July 25, 2014

sand prints

I will preface this post by saying that, in my opinion, this idea sucks. You will not find instructions on how to make adorable sand footprints here because I failed at it 5, count them, 5 times. Don't get me wrong, those who have successfully done this have a beautiful little keepsake hanging on their wall. I would love for one of those moms to come to my house and make one of my childrens' feet. 

This is a photo of the best of my five attempts. It actually looks better in this photo than it does in person. 
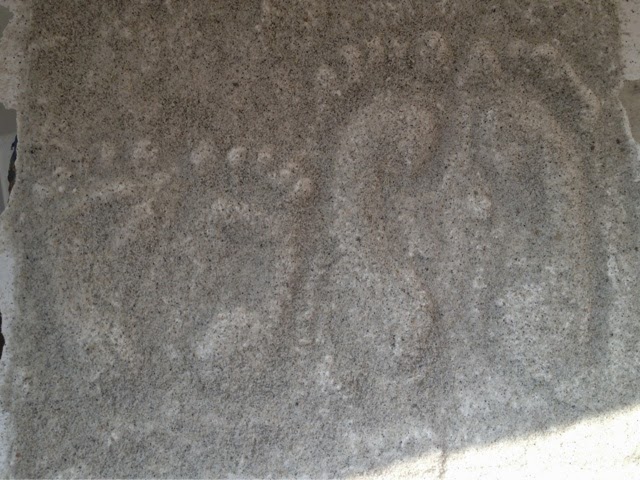
I had a number of problems over the course of five of these. I had cracked plaster, feet with no toes, sand that was too dry then sand that was too wet. I cannot tell you how to successfully do this but I will tell you the theoretical process. I will never, ever attempt this again so if you try it and are successful send me a note giving some hints and I'll post them. 

You need sand, plaster, a clear sealant spray, and a picture frame. 
Remove the glass from the picture frames and put the back of the frame in backwards. 
Fill the frame with sand and have your kid(s) make footprints. Here's a photo of that step. 

Smooth out the sand around the prints and cover in plaster. 
Let it dry completely then flip frame over carefully to remove plaster and sand. 
Brush excess sand off and spray with sealant. You can also add shells to make me really jealous. 

All in all, I wouldn't recommend this at all if the end result wasn't so cute. It's messy and the only interactive part for kids is making the footprint, which isn't much fun. I won't be trying it again but good luck to you if you try it!


Monday, July 7, 2014

windsock

M and I have made a windsock before using construction paper.  This windsock was different because we used a can as the base.  It made it a lot sturdier and allowed for M to gob on the paint.  We needed a summer-y/4th of July decoration and this was perfect.  We used a baby formula can as the base, peeled off the label and painted it with red, white, and blue paint.


Once it was dry we used a star-shaped sponge to make white stars around the can.  My intention was to use party streamers as the tails but, of course, there were no blue or red streamers to be found at Target that day.  We improvised with tissue paper cut in strips.  The shades were a bit darker, which ended up matching our half-mixed paint on the can pretty well.  Finally, I punched a hole in the top of the can and used a pipe cleaner to make a hook to attach the string to.  Happy 4th!


Wednesday, August 14, 2013

recycled airplane

M and I raided the recycling bin this morning to find pieces to make an airplane.  I've been meaning to buy some real toy airplanes (like these) to hang from M's ceiling in his room but haven't gotten around to it yet.  This morning we made one of our own completely from recycled stuff.

M had fun looking through the cardboard pieces in the bin, pulling them out, and putting them back in. We ended up taking out a paper towel roll, a toilet paper roll, and a piece of cardboard that used to be part of a box.  We also used a Dixie cup but we took a new one :)

I put the plane together first.  This is my best explanation of what I did....
The toilet paper roll is the main body of the plane.  I cut the Dixie cup down so that only about 1/4 of the bottom was left and stuck it into one end of the roll.  I stuffed some paper into the other end of the roll to hold the cup in place but I only used a little because of the way the wings are placed.  The wings are one long strip of cardboard going through cuts in the middle of the plane.  The tail and the top piece are also cut from cardboard and stuck into cuts in the plane.  The only part that is glued are the propellers on the front.


Then M got to painting (red, of course).  I helped a bit.  It would have been 100% easier to paint each separate piece then put them back together once they were dry but M wouldn't have been as excited to paint his plane if it was in pieces so we did it the hard way...


Here's our finished plane, almost dry and ready to be hung....


Monday, August 5, 2013

stained glass window

This is an activity I've been meaning to try for a while but I never had clear contact paper on hand. This weekend we bought some for another DIY project for the baby's room so we were able to get this in as well. 

All you need for this activity is clear contact paper and small pieces of some other type of paper. We used construction paper because it was what we had. I think tissue paper would look really neat and give more of a stained glass look but this worked fine too. 

Hang the contact paper sticky side out on a window. We used our slider which worked well because I could put the paper lower for M. Cut or rip the other paper into small pieces then stick it on. 


M took it upon himself to name some shapes as he went, which I wasn't even expecting.  As we worked I thought it would be neat to have pieces cut as specific things that could make a scene (like animal/barn/tractor pieces to make a farm scene).  That would obviously take more prep on my part (as it was we did this kind of on the fly this morning) but I think M would really like it. 

All finished: